However, I won't judge you if you want to have a class Facebook page. :) I know a few people that have them, and it seems to work well for them. If you think you'd like to try it, read on.
Other note: I am a huge proponent of keeping personal and professional lives separated. I do not recommend that any teacher "friend" students or parents from their personal Facebook page, and I would not post on a class Facebook page with my personal account. Just my two cents. :)
Benefits to a Class Facebook Page
- Most people already have Facebook accounts -- particularly adults. This makes it very easy for them to click the "like" button and receive your updates.
- If you already have a personal Facebook account, you can use that same account to create a class page. {That's one less username and password to remember.} Supposedly, your personal Facebook page and its information will never be seen on your fan page.
- You can encourage parents and/or students to hold discussions on the Facebook wall. Easily reply to each post or add to the discussion yourself -- all posing as "the fan page."
- Share whole albums of photos
- Create events -- like holiday parties or field trips -- and "invite" all necessary people to attend. It's an easy way to share time/date/direction information and any last minute notices.
- You can update the page from the web and from an app, although you'll want to download the special Facebook pages app to avoid mistakenly posting as your personal Facebook account.
Setting Up Your Account
These instructions assume you already have a personal Facebook page. Setting up a fan page {what a class Facebook page is technically called} works basically the same way whether or not you have a personal Facebook account already, but a few of the options will be different.
Log in to your Facebook account. Look at the top, blue status bar and click the farther button that you can; it looks like an upside down pyramid.
A drop-down menu will appear. Find this section in the menu:
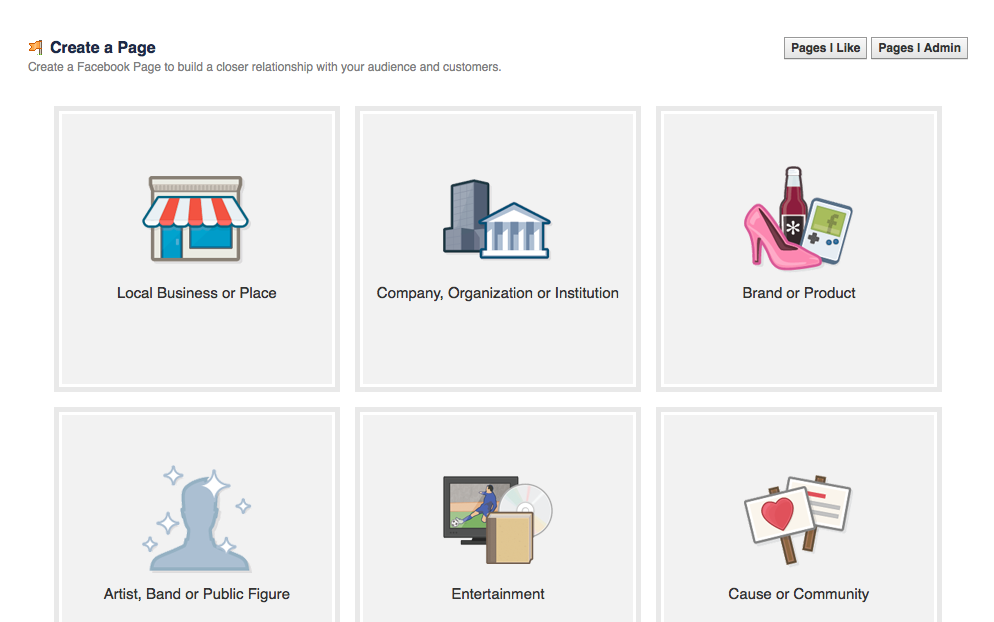
Click "create page." You'll see a page that looks like this:
This is the part where you choose the category that your class page best fits under. Personally, I think it best fits under the 2nd category, "company, organization, or institution." That's what I clicked for the purposes of this tutorial.
When you click it, new options appear in that box:
In the first box, choose the drop-down option that says, "education."
In the text box right underneath that, type in the name of your page. For instance, mine might be something like, "Mrs. K's Class" or "OUES Science Lab."
Follow the workflow on the pages that follow to finish setting it up:
Once you finish setting it up, your page almost looks like an empty personal Facebook profile page:
If you scroll down on that page, you'll see the option to invite people on your friend's list to "like" your page.
At the top of the page, you'll see 3 tabs: page, activity, and settings. Click on "settings" to customize to your liking. Personally, I would do the following...
In the general section:
- Disable the option for people to contact my page privately. Private contact means that people can message you so that only you and the other person can see it. When it comes to messages, I don't think privacy is a good thing in education! I'd disable it so students couldn't message me and potentially put both of us in an awkward situation.
- Moderate the page, at least at first. You'll have to approve of everything that's posted on the page, but that might be necessary when you are trying to get your students to understand how to post responsibly.
- Turn the profanity filter on.
In the app section:
- Enable video, events, and notes.
That's it! Give your Facebook URL to students and parents either in class, via e-mail, on your other social networking sites, or on your class website. They can easily "like" your fan page through their personal Facebook accounts, and you can begin utilizing it for educational purposes. {Keep in mind, though, that you can only change your page's URL once, so choose wisely!}
Things to Consider:
- If you'd rather your students not see your personal profile in any way, always opt to comment and post on your page as [name of page], even when using Facebook as [your name]. This means that if you comment on anything on your page, the comment will display as being from "[Name of Your Page]," instead of from your personal Facebook page. To do this, click "edit info" and "settings." Click the first box on the page and click "save changes."
- Download the free Facebook Pages Manager app for iOS devices; it lets you manage your page on the go without having to worry about it accidentally connecting to your personal information.
Hope that helps!


No comments:
Post a Comment