Image Map

Thursday, May 28, 2015

How to Disable the Re-sizing Feature in ActivInspire

It's such a small thing, but being able to disable the re-sizing feature on objects in my ActivInspire flipcharts has been really helpful for several of my lessons. Special thanks to Clair for showing me this trick!

There are a handful of flipcharts I have for my younger students where I ask them to sort objects on the screen or make predictions with pictures. A good example is in my first grade sink and float lesson:

No need to worry -- we aren't dunking live animals in water to test if they sink or float! The rabbit clipart is the best representation I could find of a small rubber rabbit toy we test. :)

In the example above, every student moves an object or two into the spot that best represents their sink/float prediction. But because there are so many objects in such a small amount of space, it is inevitable that a handful of students will actually re-size the pictures instead of moving them. It's a minor annoyance with an easy fix. 

1. Select an image in your flipchart. 

2. Find the browser section that looks like this:


If you can't find this section (it's usually on the left side of the flipchart page), press control + b to make it visible. 

3. Go into the property browser ActivInspire. The property browser's icon is shown between the arrows below.

4. Find the section that says "restrictors." Press the plus sign if the section isn't extended all the way. 


5. Find the "can size" drop-down menu and select "no."


Now students can freely click on objects in your flipchart to move/sort them without the risk of re-sizing the image. Less disruptions = more learning time. :)

Saturday, May 23, 2015

How to Get A Second Phone Number For Free

I've talked before about using Google Voice to contact parents, volunteers, substitutes, etc. instead of using my personal cell phone number, but there's a new guy on the block that may give Google Voice a run for their money: Convoi.

What is it?

Convoi is an app that is installed onto your iPhone (their website says an Android app is coming soon) and connects to your cell phone. You can use it just like you would a regular phone number: for calls, texts, and voice messages. The beauty of it is that your "real" cell phone number is never revealed, so you get to keep your privacy while still having a professional connection on your mobile device. 


Features
  • No Google account needed -- just a cell phone number (unlike Google Voice)
  • Free to download and sign up
  • 30-second sign up
  • Choose your area code (but not your phone number)
  • Automatic transcription of voicemails
  • Access all your contacts via your phone, but make the call from within the Convoi app to use your "business phone number."
  • Free conference calling
  • Option to call over Wifi or using your phone's data plan
  • Individual and group text messaging
  • "Do not disturb" feature lets you ignore communication during non-business hours

Any cons?
  • Once you choose a phone number, it can only be changed once (so phone numbers are not disposable like Google Voice numbers are)
  • If your mobile plan does not support long-distance calling (or has limited long-distance calling minutes) and you choose an area code different than that of your mobile phone number, you will be charged for calls as if they are long distance

Thursday, May 21, 2015

Organize Your Life With OneNote

Are you a person that has stacks of handwritten to-do lists, meeting notes, data analysis, lesson plans, and just paper of any kind? If so, you need to read this post!

I'll be the first to admit that I never used any Microsoft product except the Office Suite until this year. A colleague introduced me to OneNote (a Microsoft product) last year, and I didn't see the value. I already had an Evernote account, so why switch to OneNote?

Earlier this year, though, I went to TCEA with several teachers from my building. One of them is a Microsoft advocate (hi, Scott!) and kept raving about OneNote, so I finally decided to see what all the fuss was about.

I can now say that I've transferred all my Evernote contents to OneNote, and I don't even use Evernote anymore! For me, OneNote is the way to go for organizing files in my personal and professional life.


In a Nutshell
The concept of OneNote is simple: create virtual binders in which you can add virtual dividers and pages for optimal organization.


Features
  • Create as many binders as you want with as many tabs and pages as you want
  • Color-code tabs and pages
  • Use any font on your system (I'm a font snob, so that capability is import to me! Kidding...kind of)
  • Add tags to notes for further organization
  • Create to-do lists that you can actually check off
  • Import or create tables, graphs, charts, pictures, links, screenshots, or spreadsheets so they are visible without having to click and open documents
    • Upload any of the above-mentioned items -- this shows an icon with the item for you to click and open
  • Record audio and video directly within the binder
  • Use free page templates to easily format your pages to look however you'd wish
  • Draw on a page in any color (highlight, too!)
  • Insert shapes
  • Export pages in a variety of formats
  • Password protect sections of any binder
  • Put a binder within a binder
  • Share binders with others -- they can have viewing or editing rights
    • See recent edits in the binder and who made them

How I Use OneNote Professionally
I have one binder all my lesson plans. It looks like this:


I have four tabs -- called "sections" in OneNote -- they're the blue, orange, pink, and purple colors you see in the picture above. Each has several pages inside. So, for instance, the "materials" tab has 26 pages -- one for each letter of the alphabet -- where I keep track of materials I have in the Science Lab and which cabinet they're in. 

After that, I have a separate section group for each of the grade levels I teach + one for PO information. When I click on a section group, it opens to what basically looks like a binder within a binder. So, for instance, this is what my 1st grade binder looks like:


In this way, I think OneNote is even more versatile than a real binder because I can't keep physical binders within physical binders. :) And obviously, you can't really put attachments into physical binders, either. 

In my grade level binders, each section contains every lesson I teach in that unit. I also have a page at the top of each section for the materials I need for that unit -- all consumables are written in green so I can make my Walmart list quickly, and any printable materials are written in red.

A look at the pages I have inside my 1st grade matter section

I also have another binder that's for teaching but doesn't have anything to do with my lesson plans:


Instead of a notepad that I'll promptly lose, I take my iPad to meetings and use the free app to take notes in the "meetings" section of this binder. You'll also notice the "PD" tab, where I take notes at any professional development workshops or conferences I attend.

I love the seemingly endless amount of capabilities OneNote has and how users can customize it to fit their life and needs!

Other Ideas

  1. Student conferencing tool - Create a tab for each student. When you meet with students about, say, their reading, create a new page to document the meeting. Record a student reading and store in his/her OneNote tab so you can more easily track his/her progress. 
  2. Professional development - Organize meeting, conference, or workshop notes
  3. Resources - Do you have a lot of random sheets of paper you have to file away for your class? Attach them all in OneNote so they're easy to preview, find, and store.
  4. Parent contact log  - Use the table option to create a log for parent contacts. You can record text or audio notes about who was contacted, what the meeting was about, the method of contact, etc. 
  5. Student examples  - scan and attach student examples for big projects so you'll have something to show future students.

Tuesday, May 19, 2015

App Smashing: Using 3 Apps to Create a Virtual Food Chain

Sometimes one app just doesn't cut it, you know? Combining two or more apps into one project is called "app smashing." Here is how my 3rd grade students used 3 apps to create a virtual food chain:

Step 1: Think of a food chain. My third graders had been studying barn owls -- their adaptations, their prey and predators, and their owl pellets. For this lesson, my students were instructed to create at least a 4-step food chain.

Step 2: Open drawing desk. (I prefer "doodle desk" or "kids desk" mode.) Draw the first step of the food chain, save it to the camera roll, and then make your way to a blank screen in Drawing Desk. (Learn more about Drawing Desk by reading this blog post.) Draw all 4 parts of your food chain this way, making sure to include only one energy source/plant/animal in each picture.

Drawing Desk (free)
Step 3: Open Shadow Puppet Edu. Each of the 4 pictures students just drew in Drawing Desk and saved should be in the camera roll. Students should load each of the 4 pictures into a Shadow Puppet Edu slideshow in the correct order. Use the narration feature to record your voice on each picture, telling us what the item is, if it's a producer or consumer, and if it's a carnivore, omnivore, or herbivore.

So, for example, we might hear these narrations:

  • First slide: "This is the sun. It is the energy source for the plant, so it is not a producer or a consumer."
  • Second slide: "This is grass. It is a producer because it uses the sun's energy to make its own food." 
  • Third slide: "This is a grasshopper. Its prey in this food chain is the grass. It is a consumer and an herbivore."
...and so on. :)


Shadow Puppet Edu (free)

Step 4: Export the Shadow Puppet Edu show to Seesaw and submit under your name. 

Seesaw: The Learning Journal (free)

I think the kids had a good time "app smashing" to make our digital food chains, and I love that the creation process allows me to see each child's personality in their work! Here's one example of the work I received:


Fun!

Saturday, May 16, 2015

Draw on your Mobile Device with this App

I found a free app called Drawing Desk that I just had to share. It is available in the App Store, the Google Play store, and on Amazon, so it seems like a great option for a Bring Your Own Device district!

There are lots of apps that let students draw on the screen with their finger, so what makes Drawing Desk so special? Easy: variety of options! Besides being available across a variety of platforms, Drawing Desk actually has 4 slightly different modes that can benefit students of all ages.

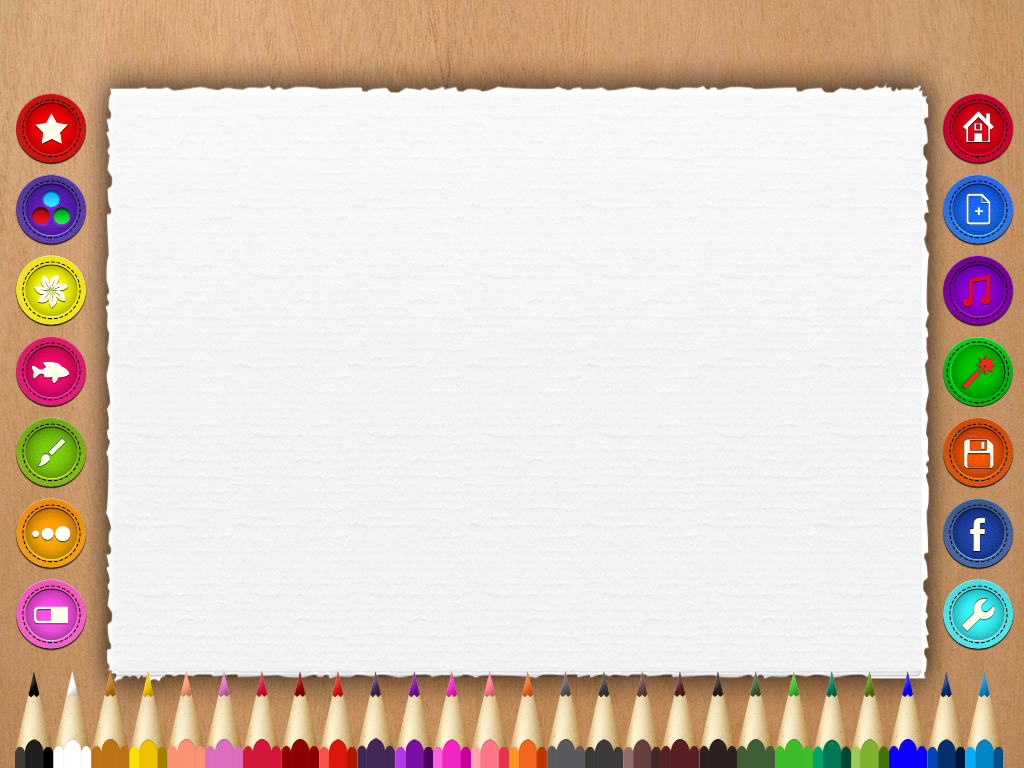
The home screen displays the 4 modes inside brightly colored dots. The kids' desk is best for K-2, so even if your students can't read yet, you could tell them to click on the blue dot to get started. Here's the home screen:


Let's tour the modes in the order they're presented on the home screen. First up is "photo desk" mode, which is basically a giant photo editor. You can crop the photos or add stickers/borders/filters to them before saving to your camera roll. I personally don't think there's anything Earth-shattering about this mode, but it's good for basic edits.


Up next is "doodle desk" mode. As you can see, there are a variety of options listed on both sides of the screen. Besides the regular drawing and choose-your-color capabilities, the stamps, 3D brushes, and stickers are a unique touch.


Some stamp options are shown below. The first page of stamps and stickers are the only free ones -- all others are offered via an in-app purchase -- but I don't find it too limiting.


Below are some sticker options.


Here's a tour of the "kids desk" mode. This is geared mostly to the K-2 crowd, although of course anyone could use it.


The red button on the left gives students some stamp options. These look more cartoon-ish than the stamps on the other modes, but it is intended for early childhood students.


The cluster of 3 dots in the 2nd button on the left lets students choose any color from a spectrum, so users aren't just limited to the pencils on the bottom of the screen.


The yellow button on the left gives students some pattern options; choose any of the patterns, drag your finger across the screen, and see that design in the line you just wrote. It reminds me a little of those Crayola Stamp Markers that were all the rage when I was a kid. :)


Stencils are a fun addition to this mode; access them by clicking the pink button on the left. I like that these are black and white, so students could add personality or make them match their drawing by just coloring in the lines -- almost like a virtual coloring book.


Finally, here is the "sketch desk" mode. This looks like it's intended more for the serious artist, as it gives different medium options on the left.


No matter the mode you pick, students can always save the picture to the camera roll. From there, you can import the drawing into any app or get it off the iPad to showcase to the community.

Ideas for Use:
Use as a replacement for paper any time you would normally ask students to draw something! In Science Lab, this means lots of diagrams. But students could also illustrate a picture to a story they wrote, use Drawing Desk in place of a poster board for a project or presentation, or illustrate a series of math problems.

Wednesday, May 13, 2015

How to Control Your Computer with Your Mobile Device

WiFi Mouse Pro has been an absolute game-changer for me. This app is regularly $2.99, but I was able to snag it while it was free. {If you're interested in finding out about apps when they "go free," download an app like this one that alerts you to a handful of free apps per day, or join TCEA, where you can get a daily digest of free and on sale apps and Kindle books.} Even so, I'd totally pay $3.00 for it now that I know its true value. (There is a free version of the app that has some limitations, if you're interested in that.)


WiFi Mouse Pro lets you control your computer via your mobile device, which means you can now control your computer from anywhere in the room. Not only does it provide a fully functioning mouse via your mobile device, the app gives you access to your keyboard so you have complete control over your computer. 

For instance, when my students participate in stations, I often use online-stopwatch.com to help with time management. But when the alarm goes off, the sound can be a bit jarring if I'm not able to turn it off quickly. Now that I have the WiFi Mouse Pro app, I can walk the room freely during station work, knowing that as soon as the timer goes off, all I have to do is take my phone out of my pocket and use the mouse on my screen to click "stop." I can then re-start the timer from the other side of the room and continue to monitor student progress at the stations. It essentially stops any interruptions from the presentation so that students have more time to learn.


How It Works

1. Download the app to your mobile device.

2. Go to this website to download the free software component to the computer you need to control. Be sure to run the software once it's on your computer. (It should be called Mouse Server, and it will appear as the small, yellow and black icon on the bottom row, right corner of the picture below.)


3. Open the Wifi Mouse Pro app to see this screen:


4. You can try to auto connect, or you can put the IP address into the white box {covered by a black box in the picture above for privacy reasons :)} and press "connect." {To find the IP address of your computer, just click on the Mouse Server icon on your computer -- as shown two pictures above -- and a pop-up should appear that contains your computer's IP address -- shown below.}


5. After you're connected, you'll see a screen like this on your phone, which means you're ready to control your computer with your phone:


This is your virtual mouse. If you look closely at the bottom of the screen, you'll see buttons that look like a computer mouse. They work the same way as the real thing: left or right click to get what you want. :) 

The "_," boxes, and "X" in the top, right corner essentially work like they do on your computer -- minimizing, resizing, or closing out of the current screen.

You'll also notice a row of icons below the virtual mouse; these allow you to control your computer with your device in more ways than just by clicking. Click the triangle on the bottom left of the app to bring up the keyboard. You also do this by clicking on the 2nd icon from the left, as highlighted in the picture below:


Below are some screenshots of what the other icons do...but I don't know a whole lot about them since I mainly only use the mouse and keyboard features. :)


The gear icon in the top, left of the app's home screen allows you to change the mouse and scroll sensitivity, enable a left-handed mouse, and toggling options such as auto-connecting on start-up, keeping the device awake as long as the app is open, dimming your device screen when you're not using it, etc. 

If you'd like to try the app before buying, check out the free version. It does have some limitations, but you can still get a feel for what the app does. 

Would you use WiFi Mouse? Why or why not?

Sunday, May 3, 2015

Dropbox Adds Commenting Feature

I've written about Dropbox in the past, but their most recent update is pretty cool, so I thought I'd share!
As a reminder, Dropbox is a place for you to securely store files of all kinds on the web and access those files from any device that is connected to the Internet. Two nice bonuses are that you never have to worry about losing or corrupting a flash drive again, and that you can recover recently deleted files fairly easily.

I've advocated for Dropbox over other cloud storage services because I just think the layout is simple and intuitive, but there was a feature I thought was missing...until now. :)

Dropbox now offers the ability for users to comment on any file. Additionally, you can specifically "mention" Dropbox users who have access to your files -- almost like the mentioning feature on Twitter or Instagram. 

Any user who is the owner of that particular folder, was mentioned in the comment by using the @ symbol, or has participated in commenting on that file before will receive an e-mail about any addition to the conversation.

I could see this being a real asset to teaching teams who use shared Dropbox folders. Easily make a comment to give more information about a particular file is, what time or year or part of the Scope and Sequence this file pertains to, changes that need to be made on a lesson plan before next year, etc.

Learn more about Dropbox's new commenting feature by clicking HERE.

Saturday, May 2, 2015

Message Students & Parents Without Revealing Personal Information

I wrote about this service back in 2013, but they've debuted some new features since then, so I thought I'd update. :)

The service makes it super-easy to get the word out to your classes in that it:
  • provides a PDF with step-by-step directions that you can print or post on your class website
  • allows your classes to sign up to receive updates either by text message OR by e-mail 
  • provides a widget code for you to cut-and-paste into your website so that everyone can see updates {regardless of if they've signed up to receive the updates on their personal device or not}

Other key features about Remind:
  • free
  • download the app for on-the-go updates
  • pre-schedule messages or send them in real time
  • ability to attach files to messages
  • set up as many different sections or groups as you want {so you could have a section for your tutoring group, Spanish club, church's youth group, homeroom class, and daughter's basketball team if you want!}
  • view subscribers in each group and the date in which they joined
  • ability to make personal notes about each subscriber {I find this most helpful when I have parent subscribers because I can make a note of which child "belongs to" them!}
  • view all your past sent messages and choose to send them again or tweet the message
  • no deletion available {helps protect teachers and students!}
  • chat feature {more information below}
  • stamp feature {more information below}
-----

Chat feature: available starting in April 2015, but Remind is rolling it out a group at a time. For instance, app users on the wait list will receive it first, and then they'll roll it out to web users. Get your name on the wait list by logging in to the app and clicking on "chat." Learn more here.
  • Unless otherwise enabled, only the teacher can initiate chats
  • Can set "office hours" so you're only contacted during times of your choosing
  • Transcript of all chat history is available
  • Allows you to chat one-on-one with anyone in your group instead of sending a mass message
-----

Stamp feature: available on April 20, 2015:
  • allows recipients of your message to provide instant feedback without the sender getting a barrage of messages
  • Stamp options include these symbols: ★ ✓ ✘ ?
  •  = I like it, I appreciate this, and/or this message is a favorite of mine
  • ✓ = yes
  • ✘ = no
  • = I don't understand, I have a question, and/or I need more information
  • Subscribers see an overall count of the results, while the sender sees how each subscriber answered
  • Great way to check for understanding in class! 
  • Remind's list of 10 suggestions for using stamps {some include using it as a quiz or polling option -- great idea!}

Have you ever used Remind? If so, have you used or will you use the chat and stamp features? If you haven't used Remind, would you consider it? Why/why not?