
In case you're unfamiliar with Punchbowl,
it's a free service that allows you to send digital cards to anyone
with an e-mail address or anyone on your social media site(s). Users can
choose from hundreds of designs, quickly create an eCard and send it
without ever having to run to the post office. This post gives an overview of Punchbowl
and this one tells you how to send a digital invitation.
Sometimes, though, you just need to send a "regular" card -- not an invitation.
As a classroom teacher, you could use Punchbowl to send holiday cards, "welcome back to school" cards, reminders about big events or projects, thank you cards to volunteers, etc. When sending a digital card via Punchbowl {as opposed to an invitation}, you have the ability to include a gift card, which I think is pretty cool. Here's how to send a "regular" digital card via Punchbowl:
1. Create a Punchbowl account. {This post talks more about the differences between the different memberships.}
2. On the home page, you should see something like this at the top:
 |
| The top of your page may look slightly different, depending on the time of of year when you log in. |
Hover over the sections at the top to see more options, click "greeting cards" in the top, right to see all options, or type something into the "search" bar to look for something specific.
3. Click a card to choose it. I chose a holiday card for
this tutorial so I can post it on my class blog and social media...killing two birds with one stone and all that. :)

4. Click the green, "continue" button in the top, right when you decide on a design.
5. Include a gift card? Or not? Click the answer that most appeals to you..
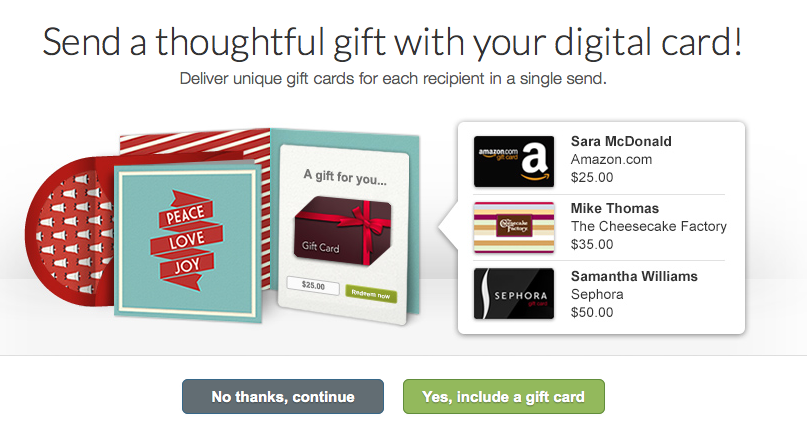 FYI: if you choose to include a gift card at the beginning of making your card, you can always take it out later if you change your mind. Gift card options include Amazon, Sephora, The Cheesecake Factory, Panera Bread, Regal Cinemas, Gap, Home Depot, Old Navy, Nike, Athleta, LL Bean, Spa Week, Golfsmith, Charity Choice, Banana Republic, Game Stop, Bass Pro, and Zappos. Gift card amounts start at $10 and can go all the way to $500. You can also send a gift card to more than one person in your card.
6. Personalize.

Change your card design at any time by clicking the blue, "pick a new design" button in the top, left corner.
Change your card design at any time by clicking the blue, "pick a new design" button in the top, left corner.
Clicking on the text lets you edit the font, size, and color.

Clicking the green "next" button in the top, right corner lets you move to the next personalization option.
Customize your envelope stamp, postage, and liner:

Punchbowl always puts coordinating liner, stamp, and postage on your card, so it looks great even if you don't want to mess with customizing it. However, for those that like the option, there are tons of designs to choose from, and you can "view all" or view only the ones in a certain category {for instance, "holiday"} to make your life easier.
7.
Click the green, "save and continue" button at the top of the screen
when you are ready to "seal the envelope" and send your card.
6. Add recipients.

As you can see in the picture above, you can add e-mail addresses and/or names individually, or you can import them from your e-mail's contact book. You can also send your card via Facebook, Twitter, or link {like I will probably do on my class Instagram account}.
Choose to receive an e-mail when each recipient views the card, get a copy sent to your inbox, and/or send the card at a later date.
Click the "view preview" button on the right to see what your guests will see when they open the card.
Click the green "send now" button in the bottom, right when you're ready to "mail" your card.
Here is my finished product:


No comments:
Post a Comment