Image Map

Monday, August 11, 2014

Blendspace

I've been making lessons with Blendspace for my classes this year, and I really enjoy it so far.


In a nutshell
Blendspace is a free service that allows you to pull content from various sources for a single lesson, and then store and present that lesson online.

More details
Blendspace allows you to import media from a variety of places on the web or upload your own stuff {from a cloud service, any website or embed code, from your computer, or just by typing directly onto the page} and keep it all in one space. It's set up like a grid, and you drag and drop your lesson components into the grid's boxes where you want them. You can rearrange the boxes however you'd like, which is, essentially, rearranging your lesson.

Blank lesson template

It's a great way to pull in a variety of media types for one lesson and not have to hunt down each component separately. For instance, I have one lesson where I uploaded a YouTube video, Google images, my direct typing, a PDF from my computer, a picture from my Dropbox, another website, and a Prezi presentation. I like that Blendspace keeps it all in one place so I don't have to hunt down each component on its own when I'm teaching the lesson.

Users can "play" a Blendspace lesson much like they would a PowerPoint presentation -- just click the arrows on the right and left to scroll through the slides. Depending on how details you make your  lesson, I think you could literally just type the link to the Blendspace into our lesson plan book and be done with it. I particularly love that I don't have to write a lesson plan that lists every single component I'm going to use because Blendspace corrals it into one space for me.

There are a few ways to share a Blendspace lesson: you can link to it {which is short and sweet}, share an automatically-generated QR code, share on social media, and/or embed it onto another website. 

Here's an example of an embedded lesson that I made for my 2nd graders about the scientific method:


If you are doing a flipped classroom, the ability to share on social media would be nice. I could also see a teacher just showing the pre-generated QR code on the Promethean for students to scan as they walk into the room... Then students can immediately begin working on the day's lesson without the teacher doing anything other than clicking a couple times.

Speaking of lesson planning, if you ever have a substitute, all you'd need to do is send them the link to your Blendspace lesson. As long as they have some way to log on to the computer, that link would be all they need to get through the day. You can even print them a copy of the lesson so they know which slide is coming next. The printed version of the lesson above would look something like this:


Blendspace allows you to make your lessons public or private, AND you can share and collaborate on them with your team. The collaboration portion would be great if you are team teaching because you can all work on and teach from the exact same Blendspace lesson. And because some Blendspace lessons are public, you can search for other teachers' lessons, copy their to your account, tweak them for your needs, and then share them with students.

Browse other teachers' lessons by subject or search for one on a particular topic
You also can create classes and assign Blendspace lessons to each class. I use this portion for sorting the lessons I use for my five different Science Lab classes so I can easily find the lesson I need, but there's another use for it, too: Blendspace allows students to connect their account to their teacher's.  You, the teacher, can assign lessons for the students to view, and then you can see when or if the student views it {another great option for those you that are doing flipped or blended classrooms}.  Additionally, if you add any quizzes into the Blendspace lesson, the students can take those quizzes on their own account, and Blendspace will grade the quiz and send the results back to you. I personally haven't been able to utilize that option because my kids are so young {and don't have access to many online accounts because of their lack of e-mail address}, but I think that would be amazing for any teacher trying a flipped classroom.

The top toolbar doesn't give you a lot of options -- just enough to get you by -- so the website isn't overwhelming.

Blendspace saves your lessons continually as you work -- much like LiveBinders -- so there's no need to remember to hit the "save" button over and over again. In fact, there isn't a "save" button.

There are 5 templates, which just give you different ways to show the grids in your lesson. You see the first template in the picture of the grid toward the top of this post. Other templates make the boxes larger or put them into a scrapbook-like format, with some squares bigger than others.

There are only two themes: gray or colorful. The gray theme makes the top of every square gray. The colorful theme give each square a color based on what type of media is inside the square -- you do not get to choose the colors. For instance, the video below has a red-orange title, while the picture has a teal one.


Text that you type directly into your Blendspace lesson has a purple title, and links you import are blue.


You can add a title to every box, which shows up above the element when you are "playing" your lesson in the enlarged view. Other users can also add comments to the different squares in your lesson, which means that your students could add comments if they have an account.

Additionally, you have the ability to add captions to all of the boxes in your lesson grid except the "type directly into it" boxes, and those captions appear in a white space to the right of the squares when you're playing the lesson. You can choose to show or hide the captions while you're playing the lesson.

Here are some video tutorials I made about Blendspace {remember to type in the password to have access to the videos... CISD employees, it's our plural mascot}:
Also: this link provides you with some ideas about how to use Blendspace in your classroom.

Thursday, July 10, 2014

EDpuzzle

If you ever like to show videos in your class, you may love this resource! It's called EdPuzzle.

With EDpuzzle, you can search through a variety of video streaming websites {or upload your own} and customize the video so it fits perfectly with your class. 

You'll need to sign up for an account before you can do any creating, but it's free and easy to do so. The kids don't need an account unless you'd like to track their views and answers, but EDpuzzle allows kids to sign up with their Edmodo account, which is perfect for those elementary kiddos that don't yet have an e-mail address. 

You can always search for already-made videos, but if you're looking to customize your own, just click the "create" button at the top of your screen {once you've logged in}. 


From there, search through a variety of video channels to find the perfect one to edit {or upload your own video}. 


Now it's time to edit. If you want to crop the video, you can do that first. 


Press the next button to have the microphone light up.


This is where you get to add voice-over to the video. This feature allows you to add your voice over the entire video. The way I understand it, you'd actually be talking while the video is playing, so if the video has useful narration or dialogue, this feature might actually have the opposite intended effect. However, you could voice-over a video with no talking, I suppose.

Click next when you're finished. {You can skip any of these steps by clicking "next" without making any changes.} You'll light up the speaker button.


This feature also utilizes your voice, but this time, you can only add comments. So the video will play until it reaches a comment you've inserted. The video will pause, play your comment, and then resume playing the video. I like this much better than the voice-over feature because it doesn't take anything away from the video. 

Click "next" to get to the quiz portion. 


You can add open ended questions, multiple choice questions, and/or comments anywhere you'd like. It works the same way the voice comments work, in that the video plays until it gets to a question, pauses, shows the question, and resumes only when the question has been answered. 

You can add more than 1 question in each spot if you like. 

When you're finished, you name your video and decide if you want to assign it to a class or not. Assigning it to a class means that all students who are registered for that class {signed up for the website and joined your class with a special code} will see the video as an assignment. You'd be able to see if/when the student watched the video and what answers he/she wrote on the quiz. If you don't assign the video, you can still play it in class, but you obviously won't have individual results. 


You can edit the video at any time, copy it to make something similar, delete, or embed it onto your website. Here's what it looks like embedded:


So far, I am loving EDpuzzle and can't wait to see how it works in my class. 

Wednesday, June 25, 2014

Smore

Smore is a free website that allows you to make colorful, online posters {You do have the option to print it when you're finished.}

Every year, during the organisms and environments unit in my 4th grade Science Lab class, I ask students to create an organism of their own with certain adaptations. It's a big ordeal, but I am always amazed and so impressed with the results.

I won't go into too many details about the project, but one of the requirements is to create a write-up for the science notebook that includes all of the necessary details. I give students a template, and they just fill it in with their information.

The template gets the job done, but it is rather boring to look at. I think this works against me when I go to explain the project to the students; I am always looking for a way to spice up the lessons!

Since finding Smore, I decided to use it to display my example. Below, I'll show you screenshots of the features of Smore while I'm working on my poster. At the bottom of this post, you'll get a chance to see my finished project.

Features
  • Make up to 5 flyers totally free. {After that, it costs 1 credit to make 1 flyer, and the price looks steep for this frugal gal. Check out the screenshot of their current credit prices below:}
  • Send up to 200 e-mails per month {links to your flyers}
  • Create really pretty flyers either starting with a template or from scratch

The beauty about the template is that Smore has already inserted elements that are common for that type of flyer onto the template, so all you have to do is edit. 
  • Choose from 5 different designs


  • Choose from 12 different backgrounds -- all of which are pathetic, in my opinion. {If you want to upload your own, you have to pay. Of course.}

  • Pick a color from 21 options


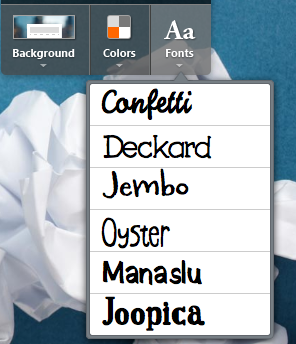
  • Choose from 6 different fonts


  • Add 11 different elements to your flyer. Drag and drop to put them exactly where you want them on your flyer. {The 12th element, payment is added if you purchase a paid plan from Smore.}


Hover over an element to see a plus sign to easily add an element right there on the flyer.

Also by hovering, you can click the "x" to delete an element or click the pencil icon to edit it.

  • When you go to publish, you can change your settings to allow/disable comments, your name and profile information, social media sharing buttons, and related flyers. You can also change the privacy of your flyer and any of your profile information. 

  • After publishing, you have the option to share via 5 social networking sites, embed it on a blog or other website, and to share via e-mail. 

  • Also after publishing your flyer, you have the option to go back and edit it, preview how it will look to your audience members who receive the link, and print it {in standard quality -- not high-res -- and with a Smore ad on it}. You can also see how many people have viewed your flyer, although keep in mind that this does include you when you click the "preview" button. :) Finally, you have the official link so that you can put it in an e-mail on your own without using any of your e-mail credits. 

Cons

  • New users get 5 credits when they sign up. Each flyer you make costs you 1 credit. If you pay for a subscription to Smore, you get new credits each month. But if you're just on a free plan, it looks like the only ways to earn more credits is to create a new account with a different e-mail address or to purchase new credits or a monthly subscription. I'm really annoyed about this. However, Smore does have an education plan for a steep discount {compared to their other paid plans, which range from $240/year to $1200/year!} -- read more about it in the next section.
  • Limited background and template choices. Not a huge deal, but can be annoying if you're working on something special because, like I said, the background picture options are truly pathetic. 
  • As far as I could figure out, the gallery has 3 pictures in it -- no more, no less. Logically, I'm thinking that number has got to be customizable, but I couldn't figure out how!
I've been trying to think of a work-around for the 5-credits thing because I rarely pay for online stuff {why pay when you can get it for free?}. You could just sign up for a new account with a different e-mail address after you hit your limit. OR I suppose you could just edit your existing flyers and download them as a picture file before re-using that template for the next flyer. That doesn't help if you want kids to use it, and it would be a pain, but I think that would be the best option if you're going to go the free route.

I don't normally advocate for paying for things since, you know, teachers aren't typically millionaires. :) However, the educator plan {$60/year} looks like a good deal if you're thinking of using Smore for classroom newsletters or with students during projects and assignments. Here are some of the cool features of the educator plan, in case you're thinking of purchasing it:


  • Use your own custom backgrounds
  • Make flyers private by default to protect students' privacy
  • Send up to 5,000 e-mails monthly
  • Get analytics for the e-mails you send out {read more about that by clicking here}. Let's say, for example, that you use Smore as a classroom newsletter website, and you send it in an e-mail to the parents each month. With this plan, Smore allows you to see who is opening your e-mails -- and who isn't -- and who clicks on any links inside them. 
  • No ads on the flyer
  • Ability to download a high-quality jpg {picture file} of your flyer so that it will print nicely, if you need it
  • Make unlimited flyers

Uses for the Classroom
  1. As you'll see below, you can use it as an example for any project or assignment. It's nice for those things because it's quick and easy to make, you can add media anywhere in the flyer, you can print it for kiddos who need a copy at their desk while they work,  and it will display nicely when projected on the Promethean. 
  2. Piggybacking off of idea #1, you could use Smore to post assignments for a flipped classroom. For instance, if you created 1 flyer per lesson that you teach, you could embed picture examples or a teaching video into the flyer, step-by-step instructions about what you want students to do, etc. Then you could embed all the lessons in a unit or semester onto one class page. All you'd have to do after that is give students the link to that one class page, and they'd know the agenda for the entire class. 
  3. Create your classroom newsletter with Smore. You can even utilize the flyer options for parents to subscribe to your mailing list and click a button to e-mail you easily. 
  4. Have students use Smore for project creation or even a portfolio. Of course, you'd have to purchase the $60/year education plan, but you could always try to make a case for it to our generous PTOs. :) 

Example
I used Smore to make an example poster for our 4th grade adaptation project. I embedded the poster onto the instruction page of our class website, and I can display the poster on the Promethean during instruction and/or print it so that students have a copy at their table while they're working. Here's my finished poster: