Image Map
Showing posts with label QR codes. Show all posts

Thursday, January 14, 2016

Chrome Extension: Link Shortener & QR Code Creator

By now, I'm sure we've all heard of link shortening services like Bitly, TinyURL, and Google's Link Shortener. We've also all heard about QR codes {check out my blog articles about QR codes by clicking here}. ...But what you may not know is that there's a free Chrome extension that will help you shorten a URL and create a QR code for it all with one click! It's called goo.gl URL Shortener.

Install the Extension
1. Make sure you have a Google account. {If you have a Gmail, YouTube, or Blogger account, you have a Google account. It's possible to connect an existing e-mail -- like your school e-mail -- to a Google account; ask me about that if you're interested in learning more! I definitely recommend separating personal from professional, so if you only have a personal Google account, I'd make another one specifically for school.}

2. Launch Google Chrome {download it here if you don't already have it}.

3. Sign in to your Google account on Chrome. {Click the small silhouette of a person in the top, right corner to sign in for the first time.}

4. Click here to view the goo.gl URL Shortener extension page. To install it, click the blue "add to Chrome" button in the top, right corner of the pop-up box.


To Use
1. Go to the web page of your choice. For the purposes of this demonstration, I'll use the contact page of this blog. :)

2. Click the goo.gl URL Shortener icon. It's typically in the top, right of your Chrome browser, and it looks like this:

3. A pop-up box will appear that says "shortening." Then you'll see a pop-up right under the shortener icon that looks something like this: 


4. If you'd like to copy the link, just click the word "copy." Similarly, if you'd like the QR code, click "QR code." The code will appear like this:


Right-click on the code and click "save image as..." to save it somewhere on your computer. The code saves as an image file, so you can insert it into almost any other file or poster you want. {You probably won't use this feature, but the "details" button gives you analytics about the link.}

From there, you can insert the QR code into a flipchart or PowerPoint or just display the link on the board for students to enter on their devices. {Click here to read about 8 ways to share links with students.}

Wednesday, August 12, 2015

Using QR Codes to Minimize Stress at Back-to-School Time

QR codes are a quick way to distribute links and other information, which is perfect during the busy back-to-school season. (Need a refresher on what QR codes are and how they work? This article reviews the basics.) 

How to use QR codes to minimize stress at the beginning of the school year
  1. Help parents or students quickly enroll in Remind. Link the phone number and enrollment code to a QR code. Participants only have to scan and send the text, and they'll automatically be connected to your Remind class. Learn more about connecting more than just a link to a QR code in this article. Read more about Remind's features by clicking here.
  2. Link to a Google Form to collect information digitally. Create a Google Form that asks for contact information, allergies, tutoring times, or anything else you need at the beginning of school (more information on using Google forms can be found here), and link it to a QR code. (More suggestions for collecting parent information digitally are in this blog post.) 
  3. Share contact information with parents. Connect a QR code to a mobile number or e-mail address so that parents can quickly contact you. 
  4. Share back to school information with parents. Do you typically distribute a paper packet of information in August? Save a tree and impress your class by scanning the papers to PDFs, uploading them to a cloud service like Dropbox or Google Drive, and attaching the document link to a QR code. 
  5. Lead your audience to a specific iOS or Android app. Need students to download very specific apps that they may have difficulty finding in the iTunes or Google Play store? Attach one app link per QR code, then collect the QR codes into a collage or photo slideshow so that your audience can quickly scan and download all the apps they need in one sitting. 
  6. Create a welcome message. You can attach freely-formatted text or an audio recording to a QR code, so it's like a secret, "welcome back" message for students. Read more about freely-formatted text codes by clicking here. Create an audio QR code by using Vocaroo or Croak.it
  7. Share your Twitter profile to make connections. You can connect to your overall profile, a specific tweet, or the last tweet from a user. Learn more in this blog post
  8. Sign in for tutoring or club meetings. Create a Google form that just asks the student for their name. Link that form to a QR code. When students come to tutorial or club meetings, they can scan the code, type their name, and submit the Google form. This creates a time-stamped document so you can tell who attended and when they were there. 
  9. Need students to visit a link quickly and can't use AirDrop? Turn the link into a QR code!

Ways to share your QR codes
  1. Display the code(s) on the Promethean. (You may need to turn the classroom lights out for this to work.)
  2. Print the code and post on a wall or on your door. 
  3. Need to print but don't want to use a lot of paper? Insert one code into a photo collage or PowerPoint, print several small copies, and distribute the slips of paper in student backpacks.
  4. Sharing several codes? Insert the photos of the QR codes into a photo slideshow (PhotoPeach and PhotoSnack are free options); the audience can scan as the photos rotate. (You can even include a caption on each photo so the audience can keep track of which codes they've seen and scanned.)
  5. E-mail it. 
  6. Working with newer iPads? AirDrop the QR code(s) into your class's camera roll. 

How to Make a QR Code

There are a ton of options, but here are some common web-based QR code generators:

Wednesday, August 5, 2015

How to Use a QR Code to Distribute More Than Just a Link

QR codes can be super-useful for quickly sharing links, but did you know you can share more than just websites?

Here are some other things you can put in a QR code:
  • prompt scanner to make a phone call
  • prompt scanner to send a text message
  • prompt scanner to send an e-mail (you can even decide on the subject and body text!)
  • an electronic business card
  • a location on a map
  • an iTunes or Android app
  • a location on FourSquare
  • a YouTube link
  • the last tweet of a particular user on Twitter
  • a tweet from Twitter
  • someone's Twitter profile
  • a WiFi network
  • free-formatted text
My favorite QR code generator is a site called Kerem Erkan, and it's what I'll use for the screenshots in this post. 

Here's how to put more than just a link in a QR code:

1. Go to Kerem Erkan's QR code generator. Scroll down on the page until you see something like this:


2. Click the arrow to reveal a drop down menu with these options:


3. Select whichever option you prefer, fill in the blanks accordingly, and click "generate code" at the bottom of the screen:


4. Right-click on the QR code that pops up to save it to your computer. 


Ideas for use
  1. Phone number: create a code with your desk phone number (or Google Voice or Convoi number) so that parents can call you quickly without having to dial a number. 
    • Similarly, create a code with a mobile device phone number (use Google Voice or Convoi if you don't want to reveal your real cell phone number) that prompts parents to text you.
  2. E-mail: create a code that connects to your e-mail so parents have one less thing to type. 
  3. Google or Bing map: need to direct parents to a field trip or other off-campus location? Embed the Google or Bing map link in a QR code so parents can easily access it on their phone. 
  4. iTunes or Android app: Ensure students download the correct app by placing the link to it in a QR code.
  5. Twitter: direct students or parents to your Twitter profile or a specific tweet without making them search for it. 
  6. Free Formatted Text: the possibilities are endless! I used to use this feature for creating a scavenger hunt (although now there is a tool that makes it even easier -- QR Treasure Hunt Generator). You could do a scavenger hunt or other challenge-based game to help kids get to know the room, school building, or rules at the beginning of school. You could also create a game over any subject or topic that hides the questions inside a free-formatted text QR code. 

Examples

1. My Twitter profile:


2. My favorite ePortfolio app on the iTunes store:


3. Freely-formatted text with a secret message:


4. Send me an e-mail:


Thursday, August 14, 2014

Use QR Codes to Display Student Work

Someone recently inquired about #22 on my post on using QR codes in the classroom. Here's what I said on #22:
Hallway decor: use QR codes in hallway decor for Open House or conference nights. You could display students' pictures (or self-portraits) on the bulletin board, and attach a QR code to their latest and greatest achievement right next to each student. Parents could get a "quick response" on what positive things have been happening for that kid lately! This would be easy to update as the year went on, since you'd just change the content of the webpage (not the actual QR code).
{You could use the title, "Students are having a 'scantastic year!' -- borrowed from this picture.}

Short answer: Each student needs to have a page on the web where the URL stays constant throughout the school year, but the content on the page can be changed whenever you want.

Need more info? Below, I'll go into more detail about 4 different options for using QR codes in a bulletin board display to show students' portfolios.

Option #1: Use Weebly.
  • Create a free classroom website with Weebly. {Weebly is the best website for making your own website, IMO! It's SO easy to use, and there are lots of options for free.}
  • After you create the site, you can start adding pages {these can appear as tabs at the top or side of your site}. You have the option to make all of the pages visible in a tab view, stack them on top of each other {only to be revealed when mousing over}, or make them all invisible. Whatever you choose, make a page for each student in your class. 
  • Grab the link to each students' individual page and put it into a QR code. You can add, edit, or delete things on each students' page whenever you want, and the QR code on your bulletin board will always link to the newest version of that page.

Option #2: Use Dropbox.
*Reminder: Dropbox is an option for storage in the cloud. You get 2 GB for free, plus an extra 500 MB for signing up with and/or having someone else sign up with  your referral link. Store files of all types in folders, and organize them very similarly to how you would organize folders on your computer.
  • Create a folder for each student in your Dropbox account. {Don't have a Dropbox account? Use my referral link to sign up, and we'll both get extra, free space!} 
  • Grab the link to each students' folder and put it into a QR code.
  • I haven't tried this option myself, but in theory, it should work. Dropbox annoyingly seems to change the link whenever an individual document is updated, but as long as the name and location of the folder remain the same throughout the entire year, you should be able to edit the content inside the folders without changing the link.

Option #3: Use LiveBinders
*Reminder: LiveBinders is a digital 3-ring binder that is fabulous for organization. Free users get tabs and subtabs in which to organize their things. Paid subscribers get tabs, subtabs, and base tabs -- great for even deeper organization. Embed webpages or HTML components, upload any document, type directly onto a page, and/or add a page of mixed media split the way that makes the most sense to you. 
  • 3A: Because the space in a free LiveBinder account seems to hold quite a bit of things, you could probably create an entire binder for each student {or have them create their own on their own account, if you don't want to manage it yourself}. Link to the binder in your QR code. The beauty of this is that students can add SO MUCH to their online space.
  • 3B: If your LB space is lacking or you simply don't want to create and maintain a binder for each student, create ONE binder, and then create a tab for each student. Students can add and organize things to their tab by creating subtabs underneath. Students can still add lots of items to their space, but not as much as if they were to have their own whole binder.

Option #4: Use Smore
*Reminder: Smore is an online tool that creates pretty posters for free. The posters can be e-mailed, shared on social media, printed, or embedded into another website. Users can make 5 Smores before they are asked to pay. Add titles, text, small pictures, large pictures, links, videos, and a few other things into the poster, and finish by customizing the background and theme.

  • Each kid needs their own Smore account if you want to keep things free. {If you want all the kids' smores on your account, you'll have to upgrade to the premium version.} 
  • Each students needs 1 personal Smore for their portfolio. 
  • Put the link to their Smore poster in a QR code. As far as I know, you can make Smore posters infinitely long, so you could keep adding all year long.

post signature

Friday, February 7, 2014

Create a QR Code from an iThing


Do you feel proficient about scanning the code above but are now ready to start making your own? Here's a tutorial.

There are several websites I use to make QR codes from a browser on a laptop or desktop computer, but there are certainly times when I need to create a QR code on the fly from my iThing {iPhone, iPad, or even iPod Touch}. I created a tutorial to show you how I do that with my favorite QR code creating app -- QRReader.

Also included in the video are various ways in which I think you could use these QR codes in your classroom. Please watch the video below for more information, and let me know if you have any questions!


Sunday, September 22, 2013

Vocaroo

Vocaroo is an incredibly easy and versatile voice-recording system that can be a huge asset to your classroom.
Via

Features:
  • Very easy-to-use interface
  • Completely free
  • No e-mail address or account registration necessary to use it
  • Ability to e-mail your recordings, post them on social media, or download the file to your computer 
  • Instead of recording, users have the option to upload a segment of audio
  • Ability to access recordings from iOS devices {although there is not an app for it...yet}
  • No limit on the number of minutes you can record using Vocaroo

Cons
  • Since you don't have to have an account for this website, you can't save any "works in progress" and edit them later
  • No app, and iOS devices don't support in-browser audio recording, which means you can't record anything from an iPhone, iPod Touch, or iPad

Tips

As with all audio recording websites, you do need access to a microphone in order to use this tool. If your computer doesn't have a built in microphone, you could always purchase a headset with a microphone like this one to help you:


{FYI: a headset microphone like the one pictured above might actually be the best option to record, no matter what kind of microphone situation you have on your computer. Because of the close distance between the microphone and your mouth, the headset microphone blocks out a lot more background noise than a built-in microphone does. I have the luxury of a quiet house, since I don't have kids yet and my husband works a lot, but for those of you whose homes are a little more hectic, you may have a harder time getting a clear recording without a headset microphone.}


How Do I Record?

The homepage of Vocaroo is incredibly simple:

...Seriously. That's it. So if you're normally a little intimidated by technology, rest assured that you can do this. :)

Click the giant red button in the center of the screen labeled "click to record," and just start talking. It is honestly that easy.

There is no time limit on the length of a recording through Vocaroo, so you can ramble away for as long as you need to. ;)

After you hit the "record" button, you'll see this screen, which means that it's recording:

After you've finished, hit "click to stop" to stop the recording. You'll then see this screen:

You have the option to listen to your podcast to make sure it sounds okay, and you can re-record if you don't like how it sounds. If you're satisfied with your recording, however, you can click the "click here to save" button, which is located in that last green box at the bottom of the page.

After you click to save your recording, you're met with this screen:

Ignore that link...I didn't say anything on this podcast; I was just taking a screenshot. ;)
Notice the options you have at this point. You can....
  • embed your recording on a website {which is what I did on our class blog last year to explain some of the features of the website}.
  • e-mail a link to the recording, right from Vocaroo {you don't have to download anything to your computer or attach anything to your e-mail in order to do this...it just sends a link to somewhere in the interwebz so that your recipient can listen. It's pretty painless. :) }.
  • share on any number of social networking sites, including Facebook and Twitter
  • link the recording to a QR code...and you already know how much you can do with a QR code
  • download the file in a handful of formats.
See how simple all of this is? If you do have any questions, you could always read Vocaroo's FAQ section.


How Can I Use This In My Class?
{A lot of these options work best if you attach the link to your recording to a QR code.}

Back to School
  1. Record yourself saying "hello" or "welcome" at back-to-school time. Embed the recording on your website or "meet the teacher" page.
  2. Verbally explain the features of your website and/or how to navigate it; embed this recording on your website.  
  3. Create a welcome message for students and parents, and place it on your door during Open House night. {This would also work well if you had to be absent during Open House night.}
  4. Record a welcome message and place it on your BTS newsletter or postcard. Hearing your voice and how excited you are to have them in your class might be especially helpful for little ones.
  5. Create an "I'll be with you ASAP" recording and place it on your door during parent-teacher conferences. Parents who arrive early and see a closed door could scan the recording to hear that you are there, but that you're speaking with another parent at the moment and will be with them shortly. 

Make a Substitute's Life Easier
  1. Record a message to remind students about behavior expectations and when you'll back, and let the substitute play it at the beginning of class.
  2. Record the directions for an assignment. Put it in a QR code and put the code directly on the assignment page. If you had a substitute, students could just scan the QR code at the top of the handout and get your directions. 
  3. Record directions to centers or stations, put the info into a QR code, and put the QR code at the center.

Make Your Life Easier
  1. Record directions to centers or stations, put the info into a QR code, and put the QR code at the center. Instead of asking you over and over what they're supposed to be doing, students could just scan the QR code to re-listen to the directions. If you're a fan of file folder games or compact centers, it would easy to place a QR code of directions for that activity on the back of every folder or Ziploc baggie. If this works like I think it would, you would only have to explain things once. Imagine how much time you'd save and how much else you could get done! 
  2. Record instructions or examples to an assignment or project and place it at the top of the worksheet/handout/rubric. Students could re-listen to these if they get stuck during an assignment. 
  3. Save audio files of things you use regularly so that you can access them later without having to re-record. 
  4. Record yourself reading a book, page by page. Embed the recordings onto a QR code and place the QR code on each page for the student to scan. This would be great for conquering the "listen to reading" portion of Daily 5 without having to physically read to every single student. 
  5. Record your instructions for a substitute. Put the files in a special folder that a substitute can access. Then all she/he has to do is play the recordings for the class. It's like you're "teaching" even when you're not physically there.

Modify
  1. Modify work for ESL or LD kiddos by reading things to them, repeating directions, or telling them to skip every other problem... etc.
  2. As a modification, read an assessment and the possible answers and place it in the top corner of SpEd kids' papers. They could go into the hallway and listen to the test being read to them...they could even pause to comprehend and answer questions.
  
Help Students and Parents
  1.  Record project or homework explanations so kids can listen to instructions at home. Embed this recording next to an uploaded copy of the presentation template or written instructions on your blog. 
  2. Language teachers: record yourself naming items around the classroom in the new language. Put the recording on a QR code and put the QR codes around the room. If students forget how to say "door" in Spanish, they can just go scan it to get a refresher. :)
  3. Record instructions, the agenda, etc. for students who are absent. When they return, students can scan the QR code to see what they missed.
  4. Place vocabulary word pronunciations and/or definitions right next to the word in books available in your library.
  5. Place thinking/discussion questions on back covers of books or at the end of chapters so that students can have a starting point for group discussions in Book Club.  
  6. English teachers and librarians: record book reviews.
  7. Put the mp3 file on your iTunes and then upload it to your class iPods/iPads. If students are absent, they can hear instructions/the agenda/whatever fits your class best from the day they were gone. You can provide headphones so that students can catch up quietly during their free time.
  
Student Use:
  1. Let your students record book reviews for other students. Attach the review to a QR code and post it in your library! 
  2. Allow students to dictate their stories/essays. 
  3. Allow students to perform reports/presentations into Vocaroo. Embed on the class blog to share with parents. 
  4. Allow students with speech issues record themselves speaking/reading. They can listen to it and make self-corrections. 
  5. Ask students to talk about a project they completed, a poster, or an assignment that they're particularly proud of. Students who are afraid to speak in front of others might be able to give their oral presentation via podcast, and just stand in front of the room, holding their poster or prop, while the recording plays.
  6. Ask students in a group to explain their role in the group activity. 
  7. Ask students to be in charge of classroom announcements or an audio newsletter. Let kids talk about upcoming events and what's been going on in class lately; embed this recording on your class blog or post the link on your newsletter.
  8. Let students draw a poster to define a vocabulary word. Then they can record the actual definition using Vocaroo, put the recording in a QR code, and post the QR code on the definition poster. 
  9. Let students create book summaries, embed them into QR codes, and stick them on the inside cover of books in your library. 

Vocaroo lets you embed the recording widget directly onto your blog, so you can try it for yourself without ever leaving this page:

Friday, September 13, 2013

How to Create a QR Code Scavenger Hunt {the Easy Way}

Have you ever tried to make a QR code scavenger hunt? If you create one on your own, it can be a HUGE pain! Because the QR codes don't show information unless you scan them, I found myself re-scanning and re-naming codes all afternoon, trying to get my hunt "just right."

But making them has become a lot easier since I found QR Treasure Hunt Generator on the classtools.net website.

How to Create a QR Code Scavenger Hunt {the Easy Way}:

1. Go to the homepage and see a page that looks like this:


2. Click the "get started" button, and go to a page like this:


3. Follow the directions to fill in the necessary forms. You must have at least 5 questions, but that's usually not a problem, since most scavenger hunts have way more than that. Tip: You do not have to write the number, as shown in the example. That's just a way to show you an example without having to think of scavenger hunt clues. :) The only thing you must remember is to put an asterisk (*) in between the question and answer, and to put each question/answer on a separate line.

Notice that you need to provide a password at the very bottom, too. 

4. Click "create the QR challenge" to proceed. You'll see a page with this at the top:


and a unique link; that link is for your QR hunt. You can use this link to go directly to your hunt on the web at any time. You can also put in your password and be able to edit the hunt if, let's say, you made a mistake or need to delete a step. 


When you first click on the link, you can view this "teacher notes" page. I personally find this very helpful. It tells you how to set up for your hunt and some other tips/ideas for making your hunt go smoothly. 

Notice these selections at the very top:


I won't go over all of these options, but I do want to review the top two. One thing you can do is view your questions and answers: 


Obviously, I just have test text in there, so there's not much to read right now. But if I went back and edited those, it would be really nice to be able to see exactly what each question asks and what the intended answer is without having to re-scan every QR code!

You can also view the codes for each of your questions individually. This could come in handy if you were going to print your codes for any reason. {One reason I might print codes is so that I can stagger groups of students at the stations. For instance, I might start group A on step 1, but then I might start group B on step 4, just to space things out a little. I want minimal congestion in my room, as I'm sure you do, too.}


If you go ahead and scan the code above, you'll see that it's the "welcome message" to this particular hunt. The website conveniently gives directions in the welcome message so that you don't have to do that part at all. When kids scan each subsequent code, they see a count at the top {1/5 or something} so they know how far along in the hunt they are.

My kids love QR codes and scavenger hunts, so I was pumped to find a tool that helps me combine the two more easily. Best of all? There's no registration, and it's FREE. Yippee! :)

Sunday, August 11, 2013

Using QR Codes in the Classroom

*If you need to know the QR code "basics," visit this blog post. 

Think QR codes are cool, but you're still unsure how to use them in your classroom?

Test your QR code scanning skillz here
Below is a list of ways I've thought of and/or read about in various places around the web. Some ideas are best for secondary students, and some are best for elementary kiddos. If I found the idea elsewhere, I linked up to it, so just click the idea to go to the original source. 
  1. Manage library materials. The Technology Tips blog connected QR codes to a Google doc, printed the codes on stickers, and attached them to library materials. Students could then check out/in materials by scanning the code.
  2. Excite students about upcoming material. Scott Sibberson blogged about connecting a QR code to the "picture of the week" and using it as sort-of an anticipatory set to get students thinking about upcoming information.
  3. Writing prompts: connect a QR code to a writing prompt (text or picture...I've heard of people using National Geographic's picture of the day as a daily bellringer writing prompt!) and ask students to scan it upon entering the room. They could then use the text/picture they receive as "writing fuel."
  4. Assess. Scott Sibberson also blogged about connecting QR codes to quiz websites (like QuizStar) and asking students to take the quizzes either inside or outside of class.
  5. Allow absent students to catch up. Mr. Sibberson also suggested linking QR codes to the assessment/assignment of the day and posting each individual QR code on a large class calendar. Absent students could scan the QR code to have immediate access to information they missed. Since you can link a QR code to pretty much anything, you could show kids the Prezi presentation you made, a YouTube clip that enhanced learning, a PDF-version of the assignment, a picture slideshow of their classmates completing physical/social activity...whatever!
  6. Report bullying. I really love this idea, captured on livinglocurto's Instagram: use a QR code to connect to a Bully-reporting website or hotline! I'm not sure how practical it is -- I know a lot of kids wouldn't want to be caught scanning that code, but maybe the QR code would make it so "cool" that everyone would be scanning it, just to have something to scan. (Remember, part of the fun of QR codes is the novelty of it at this point!)
  7. Link to counseling/medical websites/assessments. Counselors (or teachers) could generate QR codes to suicide hotlines, informational websites about ADD or ADHD, etc. and post them around the school or in their office. School counselors could generate a QR code to a questionnaire about certain issues. For instance, if a student wanted to get a quick-read about whether or not she was depressed (to know if it was something she needs talk to an adult about), this student could scan a QR code to a quick checklist of attributes that a depressed person usually has. If she checked positive for x number of the attributes, she would know to talk to an adult about what could potentially be clinical depression. This might be great for junior high and high school students, where a quick scan of a QR code is all you need to get the information. A lot of times, those students are too embarrassed to stand and study information on a poster like that, so the ability to scan and read on the go would be invaluable.
  8. Get directions. Attach a QR code to a Mapquest or Google Maps link and put it on fliers for Open Houses or seminars, particularly if you have a large school district. People could scan the code and be given directions as to how to get to an event.
  9. Give more info about school events. Attach addresses/contact information to QR codes and put them on things like basketball schedules or StuCo meeting sign.
  10. Present. When giving a presentation in class, instead of handing out paper copies of your presentation to everyone, maybe you just hand them a QR code to scan and view while you explain. (Or eliminate paper completely by posting the QR code on your IWB.)
  11. Flip your classroom. Create a QR code to a video or presentation you've made for each topic. Hand out the code before class ends and let the students watch the presentations at home.
  12. Make text interactive. For textbooks or novels, create a QR code that links to a Wallwisher or specific Twitter hashtag. Give copies of the code to all students and ask them to participate in a discussion on that text. 
  13. Find something interesting to read. Ask students to review books in the classroom library on some type of website (Shelfari?). Afterwards, generate a QR code, print it onto a sticker, and stick it to the back of the library book. I love that students can get instant access to classmates' reviews -- those reviews are so powerful!
  14. Go on a treasure hunt. Primary Bits and Bytes says teachers could create a treasure hunt for students using QR codes. Each QR code would have to take students to a clue -- text, graphic, video, podcast of you speaking a riddle...whatever! -- that they would use to find the next clue in the hunt.
  15. Go on a textbook/novel hunt. My instructor during a Great Expectations course for secondary students detailed how to do a textbook hunt (basically asking students to get "the big picture" by way of a competitive worksheet activity), but I know there's got to be a way to incorporate QR codes! I'm still working on developing this one... when I figure it out, I'll let ya know. :)
  16. Student-made explanation videos. Primary Bits and Bytes suggests asking students to make YouTube videos to explain how they reached the end of math problems. Instead of just writing the answer, students make the videos and attach them to the book or answer sheet for you to watch/grade.
  17. Homework help: generate a QR code to a homework help website, a helpful YouTube explanation video, etc. on the top of homework. If students struggle at home with the assignment, they could review extra explanations instantly. You could also link to a special Twitter hashtag that would act as a forum for students to discuss the homework.
  18. Feedback: Primary Bits and Bytes sticks a code on the front of a student's binder/folder/journal and uses it as a way to add feedback. You could also do this for homework. I LOVE this idea!
  19. Student-parent-teacher message system: what if we made a private blog page/Wallwisher wall for each student in the class? We could generate QR codes and give them to each student and parent. Throughout the year, that could be used as on-going feedback to evaluate not only assignments, but behavior and social growth, as well. I suppose it could also be used as sort of an instant messager system to relay information like absences or transportation changes. I'm not sure on the logistics of this one, since it would take some time to scan 20+ codes every day... Hmm. I'll brainstorm some more about this one and get back to you. 
  20. E-portfolios: students could link up to their Dropbox, LiveBinders, or Symbaloo accounts, and teachers could use the codes to quickly access progress or give final grades.
  21. Link to "virtual 'fridge." When I taught English, I had a "virtual 'fridge" on my class website, and I used it to display wonderful class work on the web. What if we continued with that idea, but we generated a QR code to that "'fridge" and sent it home with students at the beginning of the year? Everyone -- not just visitors to my website -- could see the outstanding work done by the students. Parents could scan it weekly while they're waiting on dinner to cook; it could be a great, positive dinner conversation topic. 
  22. Hallway decor: use QR codes in hallway decor for Open House or conference nights. You could display students' pictures (or self-portraits) on the bulletin board, and attach a QR code to their latest and greatest achievement right next to each student. Parents could get a "quick response" on what positive things have been happening for that kid lately! This would be easy to update as the year went on, since you'd just change the content of the webpage (not the actual QR code).
  23. Spice up test reviews. {This Pinterest picture was my inspiration for this suggestion.} Create QR codes to questions or material you'd like students to review prior to the test. 
  24. Teacher contact info: as mentioned in my original post about QR codes, you could always put your contact information in the form of a QR code on a class syllabus or even at the bottom of your class newsletter! Parents/students could scan the code and automatically have their phones call or text you for help/information. An even cooler idea for this one: use VistaPrint to create a bunch of cheap, business-card-sized magnets with your QR code contact information, and hand them out at "Meet the Teacher."
  25. Take attendance/lunch count. Using Google docs or Survey Monkey, create a warm-up question for the day. Generate a code for it, and post the code by the door or the front of the room. Take attendance by seeing who responded to the warm-up. The warm-up could be a multiple-choice review...or you could "quiz" elementary students over what kind of lunch they'd like for the day -- attendance and lunch count, all in one!
  26. Keep kids safe on a field trip. Prior to a field trip with younger students, you could link contact information for the school to a QR code, and print the codes onto square stickers. Each student could be required to wear the sticker all day long. It's more subtle than student name tags (which can be dangerous) and less expensive than matching t-shirts! ...If you planned on doing this often, you could always print your QR code onto something more heavy-duty, like a bracelet or necklace, and hand those out to the kids prior to the trip. Their ticket off the bus and to their home is to give you back the QR coded accessory. :)
  27. Let students self-check homework. As per Classroom in the Cloud: for daily homework or a study guide, link a QR code to the answers, and place the code at the bottom or on the backside of the handout. Allow students to check their own answers.
  28. Meet the teacher...at Open House. Also from  Classroom in the Cloud: Have each teacher create a picture slideshow or video that tells about themselves and post the QR codes to those shows on the classroom door. Parents/students can scan the codes to "meet" teachers.
  29. Meet the teacher...early. Attach "Meet the Teacher" QR codes (discussed in number twenty-eight) to every kid's schedule or "welcome back" newsletter when it is mailed/given out prior to the beginning of the school year?
  30. Meet the teacher...even when he/she is absent. Also spinning off of number twenty-eight, if you had to leave during conference night or Open House  night, perhaps you could post an introductory/explanatory video (in the form of a QR code) on your door so that everyone could still "talk" to you, even though you couldn't be there! Make sure to state your contact information or post another QR code that links to it so that parents could have another opportunity to speak with you.
  31. Host a chat. Link a QR code to a Twitter hashtag or special chatroom so that parents and students could chat with you.
  32. Give a bus tour on a field trip. Also via Classroom in the Cloud: create a series of graphic/video QR codes prior to a field trip. Pass out the codes and tell kids when to scan them. It's like a personal tour without you having to yell it over the roar of the bus! 
  33. Assess a field trip. Along the same lines as number thirty-one: on the way home from a field trip, you could pass out a QR code that's linked to a quiz or writing prompt and allow students to work on the assessment on the way back to school.
  34. Give ELL students extra help. Twitter user @duckinwales suggested attaching audio files to QR codes and giving them to ELL students so they could listen to the correct pronunciation.
  35. Give instructions. Attach an audio file of yourself giving instructions (say, at centers). Students could scan the code when/if they need help or an extra reminder.
  36. Model reading. Teachers of early readers could attach audio files of themselves reading a book. Imagine having a whole library of books with QR codes inside the covers that attach to podcasts of modeled reading!
  37. Link to needed textbooks. Michael Bromby suggests linking an Amazon search for your class's needed reading material for the semester/year onto a QR code. Students will have instant access to the title/author/ISBN of each book needed and can order directly from their smartphone.
  38. Link to a school supply list or wishlist. Post the code(s) on the classroom website or "back to school" newsletter.
  39. Link to your own website. Twitter user @LRDow suggested generating QR codes for each page of your class website and placing those codes directly on the page it links to. To share information with classmates, students only have to pass on the QR codes -- not the entire link.
  40. Give credit to artwork: For art teachers who display students' artwork in your galleries: post a QR code with the child's name and mugshot right next to it so that students are credited with the work without defacing their art with unnecessary writing. 
  41. Let visitors listen to a musical performance. Music teachers could link to a video/audio recording of the choir singing or a grade level performance. 
  42. Link to lesson plans. Upload your lesson plans to your class website and then post a QR code outside your classroom with a link to the lesson plans. Admin only has to scan your code to figure out what your students are learning at that very moment.
  43. Spice up a yearbook. Place QR codes in yearbooks that link to audio and video of students. Assuming the webhost never changed, imagine how amazing it would be to hear yourself and your classmates 20 years later!
  44. Connect with classmates. I used a homework buddy system with my older students: at the beginning of the semester, I ask them to find 4 classmates they think they can trust and to exchange contact information with them. When someone was absent, students didn't come to me to find out what they missed; instead, they asked a homework buddy (or checked our class website). Twitter user @raganmd suggests asking students to fill out contact information (phone numbers, email addresses, personal website URLS) on a website called Jump Scan, and then generating the QR code for each Jump Scan profile. I could easily see this working with my homework buddies program; the information automatically ends up in your phone!
  45. Explain a model. Twitter user @mrrobbo suggests attaching QR codes to physical models. For instance, on a classroom skeleton, attach QR codes with informational videos/links about each part of the body.
  46. "Choose your own adventure" stories: Twitter user @mrrobbo also suggests creating an exciting sentence for a story, and then ask readers to make a decision. If they choose option 1, scan code #1. If they choose option #2, scan code #2. 
  47. Create an on-going class story. Start the class with an exciting sentence or paragraph, generate a QR code to it, and post it on the wall. Students can then write the next portion of the story, generate a QR code to their portion, and add it to the wall. 
  48. Link to audio files. Twitter user @NigelKirkham said he put an audio file in his public Dropbox folder and created a QR code for the public folder's link. Scanning the code enabled users to listen to the file. {You could also link to podcasts.} If you're the lecturing type, this is a great way for students to get information when they miss a class. 
  49. Show definitions on your word wall. Link a QR code to the dictionary definition and put the QR code next to the word so that students can scan it for a quick refresher, if needed. 
  50. Narrate a caption. Perhaps your little students just drew a picture to answer a question, or maybe you're the art teacher, so they're creating lots of wonderful and creative art pieces. Let students record themselves telling others a little bit more about their illustration. Attach that recording to a QR code and paste the code next to the drawing.
  51. Narrate the answer to a problem. One of my best friends is a secondary math teacher, and she has a problem with students who write down the answer without showing their work. So why not have students speak their way through the answer? This could probably work with any subject: give students a higher-level thinking question and ask them to narrate their answer into a recording device. Link the recording to the QR code, and all you have to do is scan the code to listen to their answer. This might be a particularly great idea if you see a lot of cheating in your class -- you'd know instantly if someone wasn't speaking their own homework, and you'd definitely recognize plagiarism if you came across it. 
*Ideas #35, 39, 40, 41, and 42 were found on @TomBarrett's Google docs presentation on ways to use QR codes in the classroom.

Articles About How to Use QR Codes:
Happy QR-ing!

P.S. There's a great website I just found out about that is centered around using QR codes in the classroom! Here's the link in case you'd like to check it out!

QR Codes: The Basics

You may have seen these funny-looking square bar codes on advertisements, fliers, and websites, but you may not have known what they were or what to do with them:
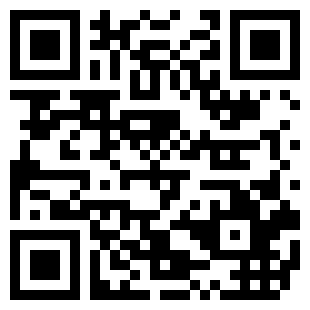
This code should take you to the blog you're reading right now.
The image above is a QR code. QR stands for "Quick Response," and it's basically a square bar code. A QR code can link to a number of things: a website, a phone number to call or text, an e-mail address, a map view with directions...the possibilities are only limited by the user's imagination! Furthermore, a QR code can be generated by anyone! Here's a cute little comic that I found at The Daring Librarian's Flickr account. It might explain QR codes better than I can:

Click the image to make it large enough for you to read comfortably

The public is starting to see these QR codes on business-related things, but I think teachers can use them in the classroom. If you'd like to read about all the ways you can use these codes in the classroom, please visit my blog post: Using QR Codes in the Classroom. First, though, let's go over the basics.


How do I scan a QR code?


Users can download a number of QR code-scanning applications onto their smart phones and use them to "read" QR codes. I know there are QR code-scanning apps available for Apple products and Android smartphones. {There might be options for Blackberry and other "smart" device users, but I'm not aware of them since I primarily deal with Apple products.}


Since I have an iPhone, I'll be using that device as my frame of reference for how-to's and screenshots in this post. I'm sure Android and other "smart" devices that have QR code-reading apps have very similar processes.


When you go into the Apple app store and search for "QR code reader," you find a fairly lengthy list of available apps. Most are free, but I've seen some apps that cost anywhere from $1 to $3. Since I'm cheap, I download the free ones. ;) My favorite QR code-reading app for my iPhone so far is QR Reader for iPhone by TapMedia Ltd.

Source

It really doesn't matter which QR code-reading app you pick, although I will be using the above-mentioned app for my how-to. Gigaom has a list of their top 5 picks for QR code readers for iPhone. Mashable lists 7 QR code readers for Android. ...Take your pick!

Once I download QR Reader for iPhone and open the application, I see a screen that looks as though I'm supposed to take a picture. This is the "scanning" screen. You'll see a square template that will fit a QR code perfectly and a red line that moves vertically on the screen {as though it's "scanning" the code}.
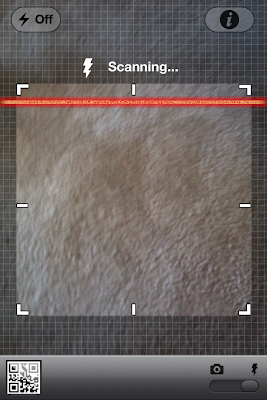
That's my needs-to-be-vacuumed carpet inside the square template... :)
Place the QR code you'd like to scan inside the square template on the screen. In case you're trying to do this as I explain, I'll provide the same QR code to this blog right here for you to practice scanning:


Once your QR code has been correctly aligned with the template box, you'll hear a slight clicking noise, which means the code has been read. From there, you'll be taken to whatever information is contained within the code.

As you can see, reading QR codes with a smart device is pretty easy. Next time you're in public and see a QR code, you can whip out your smart phone, open the scanning app, and unveil whatever information the creator wants you to see.

Don't have access to a smart device at school? Kristin at iTeach 1:1 wrote a great article titled, "How To Scan QR Codes if You Don't Have an iThing." Richard Byrne explains another way in his article titled, "Decode QR Codes without a Camera."


Why should I scan codes?

Sometimes businesses offer coupons or incentives to visitors who view their QR code information.

It's much easier to scan a QR code with your phone than it is to try to type a URL into your phone's browser with those tiny smart phone keys! QR codes are particularly convenient when a URL is super-long and complicated. In addition, since QR codes can convey things other than website links; they are a quick and easy way to get lots of information.


Sounds interesting. How can I use them in my classroom?

For some of my former students, a smart phone is the only internet access they have. So what happens when they try to visit one of my websites via their phone? Sometimes they can't remember the website address and are unable to do any of the research they needed to do. Other times, the small buttons on their smart phones prevent them from typing in the URL correctly; thus, they are unable to find the website and do the assignment. You get the idea.

While I think technology is great, it sometimes is an excuse for students. I've had many students tell me they "couldn't get the website to work at home." If you provide QR codes for all links you need your students to visit, that's just one more way they can get their homework done {and a good chance that user-errors will be eliminated}.

So what if we, as teachers, start posting our QR codes in our classroom? You could start out very simple and just generate codes for your classroom website, blog, Twitter page, Facebook page, and/or school phone number. You could place these codes on the syllabus {for older students} or the classroom newsletter {for younger students}. You could place QR codes on your business cards to hand out to students and parents at the beginning of the year or to your audience when you teach a workshop. When you pass out instructions for a web-project in your class, place the QR code at the top of your information sheet. One school I used to visit regularly had a display that read, "Meet the Teachers." Each teacher is featured on a page that contains his/her name, grade/subject, and a QR code. I scanned the codes while I was waiting one day, and found out that all the codes link back to the teachers' Alma maters! That would be interesting to place outside your door on "Meet the Teacher" night. 

These codes can provide another way to get in touch with you and/or to review the classroom information. The more methods you provide for accessing that information, the higher the probability it will be accessed!

The point is, you can create another (and possibly simpler) way for students and parents to contact you. The more venues we, as teachers, have for communicating with our students and their parents, the more questions that can be answered. No one can argue that that's not a lofty goal!

I don't necessarily think this is a better communication method than the tried-and-true "write it down" method, but it just might be eye-catching, different, and "cool" enough to get folks to access your info.


I'm on board. How do I create codes of my own?

You can generate QR codes by using an application on your smart device or a website. Let's start by generating a code from your smart phone's application, since that's what we've been working with so far. Open your QR Reader for iPhone app, and click the square QR code button in the bottom left corner. That will take you to a screen that has links to all the QR codes you've scanned with that application so far. On the bottom toolbar, hit "creator," and you'll see a screen like the one below:
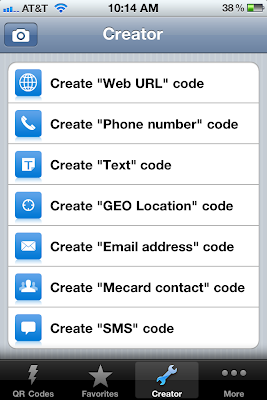


From there, it's just a matter of picking which kind of code you'd like to generate. Once you click on your desired code, you're taken to another screen that prompts you to type in your information. For instance, when I click Create "Web URL" code, I'm taken to a screen that asks for a web URL. All I have to do is type in the URL, click "create" in the top right corner, and I see my new code. To share it with others, click "save" in the top right corner. I always click "share QR image" and e-mail the image to myself before I do anything else. That way, I have the image on my computer to put on websites {or use for blog posts}. You can also share it on Facebook,  Twitter, or Tumblr; save it to your photo album; or copy it to your clipboard. Once you share it, users must scan the information using their QR reader-app of choice, and they're taken to whatever information you'd like them to see.

Easy as that.

You could also generate your QR code online from a computer. There are so many QR code-generating website out there, but the ones I use most frequently are GoQR.me, Kaywa, and Kerem Erkan. I think the first two are the most simple to use, but they lack some features that Kerem Erkan's generator has.

No matter what code-generating website you choose to use, all you have to do is find the correct form to fill out (are you linking to a website? a Google map? a specific tweet? just a block of text?), type in the requested information, and watch as the website does all the hard work. Once you generate the code, you can save it to your desktop or share it on your social media websites for others to start reading your code. 

More articles about QR codes in the classroom:

Interested in using QR codes, but you're just unsure how to incorporate them? Click HERE to go to my blog post with 40+ ways to use them.