Image Map

Monday, January 4, 2016

Chrome Extension: Turn Off the Lights

If you show clips from places like YouTube or Vimeo in class, the Turn Off the Lights Chrome extension helps you go from this display:
I love Kid President! Here's the link to the video shown above, titled "20 Things We Should Say More Often."

to this display:
notice the entire screen is blacked out instead of just the background behind the video... and I have a lovely mint green glow around the vid

Basically, this extension helps you hide ads and other video suggestions by fading the background so students can really focus on the video. {Oh, yeah: it's free, too!}

Install the Turn Off the Lights Extension
1. Make sure you have a Google account. {If you have a Gmail, YouTube, or Blogger account, you have a Google account. It's possible to connect an existing e-mail -- like your school e-mail -- to a Google account; ask me about that if you're interested in learning more! I definitely recommend separating personal from professional, so if you only have a personal Google account, I'd make another one specifically for school.}

2. Launch Google Chrome {download it here if you don't already have it}.

3. Sign in to your Google account on Chrome. {Click the small silhouette of a person in the top, right corner to sign in for the first time.}

4. Click here to view the Turn Off the Lights extension. To install it, click the blue "add to Chrome" button in the top, right corner of the pop-up box. 

Quick Start Guide
When you're about to play a video, the light bulb icon will appear in your omnibox {the place where you type the URL to a website}:


Just click the light bulb to activate the Turn Off the Lights extension. When you're finished playing the video, click the light bulb icon again to turn off the TOTL features. 

Here is the welcome guide. Click "let's discover its amazing features" to walk through the welcome guide and view all the abilities and customization options. 

Note: if the light bulb icon does not appear in your omnibox, you are probably not viewing a video that is compatible with TOTL.

Customization Ideas
There are lots of ways you can customize Turn Off the Lights {the welcome guide shows you the basic options in more detail}. I utilize a few basic options that just make my viewing experience a little better. Below is how I customize -- not a complete list! {Click here to customize the extension on your browser or right-click the light bulb in the omnibox and click "options"}:

In the "basics" tab:

1. I like to turn the opacity to 100. You can click the black square next to "color" to change what color your background is, if you want. If you prefer a picture instead of just a plain color, click either "background image" or "dynamic background." The dynamic backgrounds move; they're cool, but I find them a little distracting. The background images are nice, though -- my favorite is the red curtain that looks like you're in a movie theater. :)

Change the opacity, color, and/or image behind the video with these options

with a movie theater curtain in the background

2. Click "automatically dim the background when you click the play button and vice versa" to...well... that one is pretty self-explanatory. :) You can still turn the lights back on at any point in the video, but I like that this provides a little automaticity. I specifically don't check "brighten the background again when the video has ended" because I light being able to decide when the lights come back on. All teachers know that blacking out the screen is a quick way to get students' attention! 
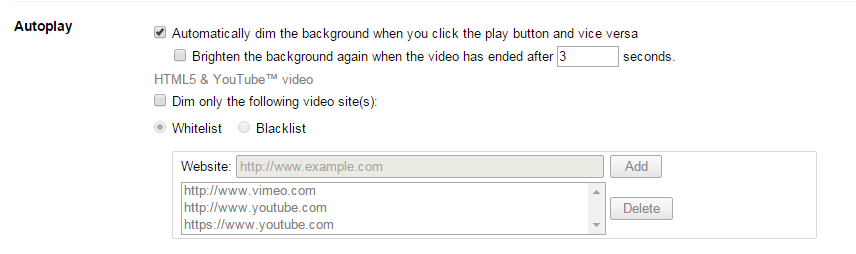

3. Scroll all the way to the bottom of that screen and click "automatically set the YouTube player to the larger size," as seen below. I like this option because it not only automatically makes the video a bit bigger, but I think it centers the video on the screen, too. 

In the "visual effects" tab:

1. Change the glowing color that appears as an outline on the video {click "show you the atmosphere lighting effect of the current playing video" to activate this option...then adjust the color(s) to your liking by clicking on the colored squares below that}. You can see my mint green outline in the screenshots above. 


Tweet this tech tip

*Edit: I received this tweet from the Turn Out the Lights company and thought I'd pass the information along!


Monday, December 21, 2015

Windows Problem Steps Recorder

CISD computers are automatically equipped with the "Problem Steps Recorder" program.

The Problem Steps Recorder is a pretty powerful tool that not only records your mouse, clicks, and keyboard strokes -- it also types your actions in a step-by-step list. All of this is placed into a step-by-step tutorial in pictures and in words. {This is slightly different than a screencast because it doesn't produce a video file.}

How to Use It

1. If you're on a CISD device, just click the start button and search for "steps."


2. Mine pops up under the "Control Panel" heading, as shown below. Click the program to open it. 


3. You should get the pop-up bar shown below. Move it wherever you want on the screen, as it will be visible during your recording (i.e. move it somewhere where it won't block essential information in your tutorial). 


4. Press "Start Record."


5. Do whatever you need to do during this time. {So if you're teaching students how to navigate to a certain website, complete those steps as you normally would.} The Problem Steps Recorder will work while you continue with the regularly scheduled programming. 

6. When finished, click "Stop Record." 


7. A pop-up box will appear and prompt you to save your recording. Choose the name and location, and save the tutorial. 


8. The file will appear as a zipped folder wherever you saved it. You can send the file like this if you want -- the recipient will have to unzip the file him- or herself before viewing the tutorial. {This is ideal when your instructions are quite long and/or you have a restriction on how large of file attachments you can send.} If you want to preview the file before you send it, you'll need to unzip the file yourself first. Refer to step 2 in this blog post if you need a refresher on how to unzip files on your computer


9. Once you open the file, you'll see a step-by-step tutorial via pictures, a step-by-step in text, and special links that allow you to review the recorded steps as a slide show {that shows each picture one by one and automatically advanced to the next picture, much like an automated PowerPoint presentation}. 

My screenshots look funny because I'm working on dual monitors at the moment. You can see me annotating over a screenshot in Skitch on the left side of the screen and writing this blog post on the right! Your computer screenshots obviously won't look like this unless you have dual monitors, too. :) 


Ideas for Use
  • Show students or parents how to access a particular program or website.
  • Show students how to use a program. 
  • Show the technicians and/or your friendly campus Instructional Technology Specialist {wink, wink} exactly what you're doing when a problem occurs on your computer -- upload your recorded video and instructions to your work order.
  • Show your mom how to work her computer {just kidding...love ya, mom!}.

Tweetable

Tuesday, December 15, 2015

Winter Tech Tools

During the craziness of this last week of school before winter break, consider trying one of these winter-themed tech tools to get in the holiday spirit:

1. Virtual Fireplace -- here or here
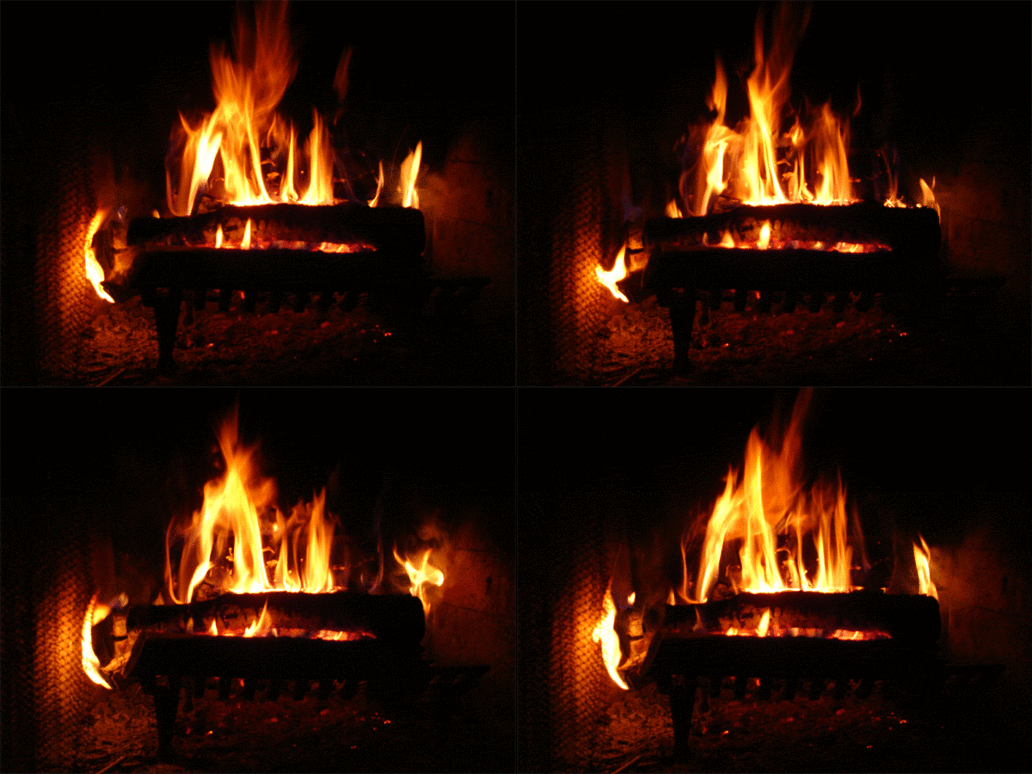
This heatless fireplace is the perfect way to make your classroom calm and cozy.

Photo source


2. Winter Magnetic Poetry (by Kasey Bell of Shake Up Learning)
Kasey created a free winter poetry activity for you in Google Slides. To use, just go to her web page and click "Get Your FREE Copy of the Winter Magnetic Poetry Template." Then click the blue "make a copy" button of the webpage that pops up. A copy of the item will automatically be added to your Google Drive. From there, your students can drag and drop the words on the snowy background to create whatever poem or story they choose. 


3. Quizizz snow-themed quiz template 
The company released this template last week -- just in time for winter class quizzes! Click here to see it live.


4. Winter Around the World Project
While it's too late to collaborate on the project this year (entries were due on December 7), your class could always take a look at this year's entries and think of ways to contribute next year!  


5. Advent Calendars - Polar Express and Christmas Around the World
No matter the age or subject you teach, try incorporating one of those advent calendars into the first five minutes of your day. One is based on the Polar Express book, while the other tests your knowledge on how Christmas is celebrated around the world.


6. Holiday Card Project (Special thanks to Heather for this idea!)
Jen, of Projects By Jen, hosts a holiday card project each year. While this year's is over, you (and students) could always browse the archivessign up for Jen's Remind group to get reminders to upcoming projects, and start preparing for next year's gingerbread-themed holiday card project.  


7. Mystery Skype (Special thanks to Heather for this idea!)
If you sign up for the Holiday Card Project with Jen, you can choose to be included in the "Ho-Ho-Holiday Mystery Skype" with several other classes. If you'd just like to find classes on your own to Skype with, browse the Skype for Education website. You could ask other classes to share their holiday customs, or try to guess where in the world a class is, just based on holiday traditions or geographical clues.


8. Interactive Websites
There are tons of holiday, snow, and winter-themed websites! Any of the links below will take you to a list of themed activities: