You can create keyboard shortcuts for anything you want, but it's obviously most helpful to create shortcuts for things you type fairly often.
On personal devices, that might mean you create shortcuts for various e-mail addresses you have, a long word or phrase you use often, your full name {to be used as a signature or when filling out forms}, etc.
On student devices, it might look a little different. For instance, if you use utilize Read Naturally, you may have noticed that the latest update doesn't save the 8-digit access code students have to use to get in the program. If you're okay with students seeing {and potentially memorizing} that number and you want to save a little time during the login process, you may consider creating a keyboard shortcut for that 8-digit access code. Or if, for instance, your very young learners {who tend to take several minutes to type one word} all have the same password, maybe you want to create a keyboard shortcut for that password.
{Note: I don't recommend using keyboard shortcuts for passwords for anyone other than very young learners. Even then, it is purely in the interest of time so that you regain as many instructional minutes as possible!}
If you're interested in setting up your own shortcuts on iOS devices, follow the directions in the screenshots below:
The previously-existing shortcuts on that device will be listed on this screen in alphabetical order. You can see that, on my school iPad, I have 3 keyboard shortcuts already entered. If I wanted to edit any of them, I could just tap the entry I want to edit on this screen.
After you click "save" in the upper right corner, you'll be free to use your iOS keyboard shortcut.
To test it, go into the "Notes" app and type the shortcut you specified earlier. The phrase should automatically pop up, as it did in my example video.
Happy typing!
Note: iOS keyboard shortcuts work in almost any app and in almost any web form, but please be aware that there are a select few applications the shortcuts are not compatible with.
In a nutshell, Google Voice allows you to call and/or text anyone from an extra, specially-designated phone number from Google...all the while, concealing your actual phone number from the recipient.
Here are some more handy features of Google Voice:
Call/text anyone through a browser on your computer
Call/text anyone through a mobile device connected to the Internet {without revealing your "real" phone number}
Call contacts that are already entered into your regular cell phone's address book {no need to enter information twice!}
Automatically transcribes voicemails and puts them in your Google Voice inbox
Listen to voicemails as they're being left
Screen calls if the need arises
Option to set "do not disturb" time {think of it like setting office hours}
Block specific callers
Ability to change the number 1 time {for a $10 fee} if the number gets into the wrong hands
Why would I use Google Voice?
You may be wondering why you even need an extra phone number. Think about those moments when you need to call a student's parent(s). Sometimes that parent's phone number is in a different area code, and you may not have the ability to make long-distance phone calls from your district desk phone. ...Or sometimes you have a lot of parent phone calls you need to make {like at the beginning of the school year when you make contact with each guardian to introduce yourself and say how excited you are about teaching their student this year}, but you don't necessarily want to be at school until 6 or 7 pm making phone calls.
Google Voice gives you the ability to contact parents via call or text message right from your own cell phone, so you can contact anyone you want from the comfort of your own home -- without the risk of revealing your personal information to parents. {I know some teachers have no problem giving their personal cell phone number to parents, but I am a pretty private person, so revealing my cell number is outside my personal comfort zone.}
I'm interested. How do I start?
I created a fairly in-depth Google Doc with directions that can take you through all things Google Voice related. {It even has a Table of Contents where you can click the subject you're interested in learning about and jump directly to that section!} Click here to view the document.
Have you heard about Recap? It's a relatively new tool that has some great features! In a nutshell, Recap is a completely free assessment resource {available on the web or through an iPad app} that lets students respond to the teachers' questions or prompts via video.
choose how students will sign in: 7-digit alphabetical PIN or e-mail address/password
add up to 10 questions in a single assignment {and, as of the newest update on April 12, teachers can now give more than one assignment to students at a time}
give an assignment to the whole class or only certain students
set a max response time to make grading faster and students' answers more precise
set a due date for assignments
add a poll at the end of an assignment that asks students how well they think they understood the material
view individual student information or the entire class's responses as a whole
grab the link to an individual video to share with others (e.g. parents, admin, your co-teacher, and/or social media)
leave written feedback/commentary on student videos
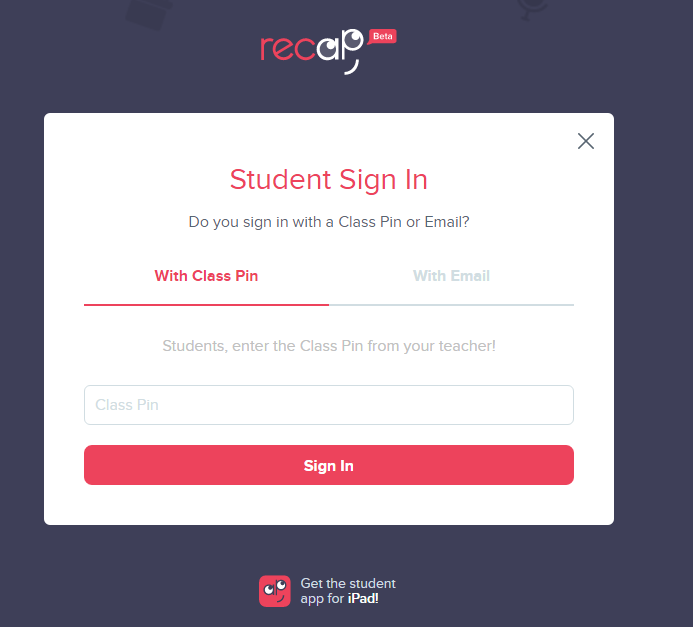
The view is super-simple from the students' side. Learners indicate that they are a student on the login screen:
Students can sign in with a class PIN or an e-mail address {whichever option the teacher enabled when he/she set up the class}:
If signing in with a PIN, the child must then select his/her name from the class list before seeing any assignments:
The student dashboard allows learners to see previously submitted assignments as well as those that have not yet been completed. The dashboard is also where students can view feedback from their teacher on submitted assignments. {Note that students cannot see other students' assignments or answers.} Here's an example of what the dashboard might look like for your students:
Don't you love that confused look on my face in the screenshot? haha!
This video -- filmed by EdTechTeacher'sGreg Kuloweic -- shows you Recap in action from both the teacher and the student side {but keep in mind that a couple of features have been added since this video was released}:
I already use Seesaw...should I still consider Recap? While there are similarities between Seesaw and Recap, it's important to recognize that these are two completely different resources. Recap is strictly for assessing students via video (and follow-up poll if the teacher enables it), while Seesaw is more of an ePortfolio tool that happens to have a video feature, too. If you are a Seesaw user, you may still consider incorporating Recap for the opportunity to differentiate questions and/or allow students to turn in video responses confidentially.
To integrate Recap with Seesaw on iPads, first make sure the Recap app is on all student devices. Then push a note in Seesaw to the entire class with the login information (e.g. 7-digit PIN if students are without e-mail addresses), as shown below.
Seesaw user tip: create a folder just for login information
While students cannot copy the PIN from the Seesaw note directly into the Recap app, this at least provides a consistent place for students to find login information independently.