Image Map

Sunday, October 11, 2015

Seesaw: Getting Started

I used Seesaw {the free ePortfolio tool} with my K-4 students last year, and it helped us make the Science Lab almost completely paperless, so it's no wonder I continue to rave about this tool! As a Seesaw Ambassador {look for me in the southwest section!}, I get constant updates about what the team is doing to improve their {already awesome} tool, so I was inspired to write a series of blog posts on Seesaw. Check back frequently over the new couple of weeks or follow me on Twitter to make sure you don't miss any of this series! 

This post is all about signing up, creating classes, organizing work in folders, and getting students logged on to Seesaw.

While it is possible to sign up through the app, signing up through the website is probably the easiest of the two; therefore, this tutorial will feature screenshots from the website.

Sign up for Seesaw
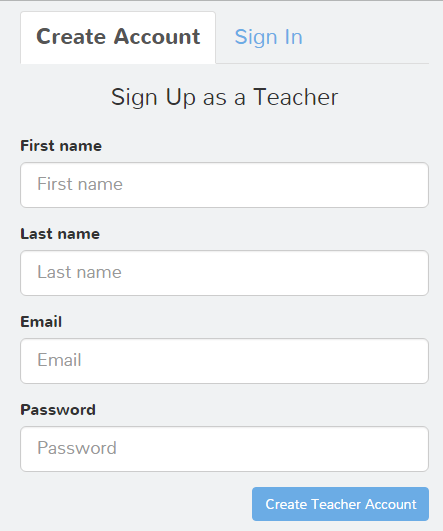
1. Click here to sign up for a Seesaw account. 


2. Click "I'm a teacher."


3. Fill in the appropriate fields {or scroll down and click "teacher sign in with Google" to connect your Google and Seesaw accounts}. 


Create a class in Seesaw
I believe users start out with 10 classes. If you need more, you can e-mail the Seesaw team and explain your situation; they are amazingly accommodating and will probably grant you more classes! If all else fails, you can have more than one account and link yourself as a co-teacher so you only have to log in to one class. :) 

1. Once you're inside your Seesaw account, click your name and/or profile picture in the top, left corner. 


The screen will slide to the right and reveal a menu on the left. Scroll all the way to the bottom of the menu, and click "+ new class."

2. Unless your students have email addresses or Google accounts, click "Use a class code."


3. Fill in the appropriate information in the pop-up box. If you select an elementary grade, student avatars automatically appear as cartoon animals. If you select a secondary grade or "other," student avatars populate as their first and last initial. {You can change avatars later.} Keep in mind that students will see the class name when they first log in. It's especially important to use a good naming convention if other teachers in your building use Seesaw, too. 


If you have a class list already handy, click "paste list of student names." 


Add one student name per line {first name, last name format} and click the green check. I recommend adding yourself as a student -- I will talk more about that in a later post. 


Click the green check again to create your class. 

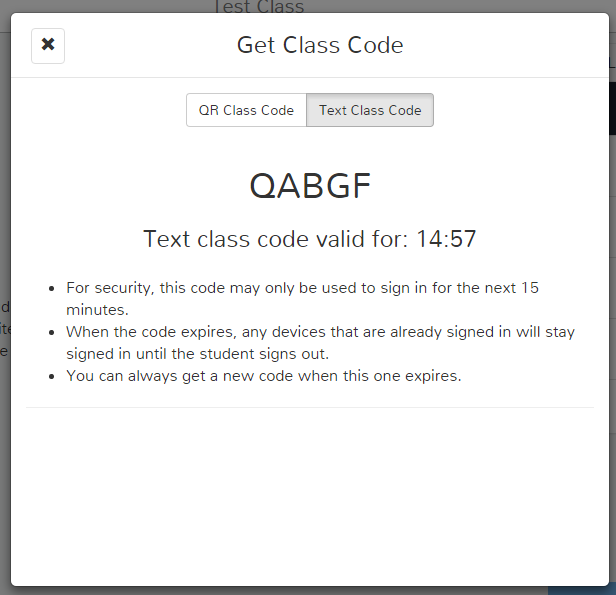
Seesaw will automatically e-mail you the QR code students use to sign in, but you can access it or the text code at any time by clicking "get class code" in the upper, right hand corner of your dashboard on the website.


The QR code is probably the quickest and easiest way for students to join your class from their device. Be aware that students will scan the QR code from inside the Seesaw app. The code will not work if students try to scan it from a QR code reading app {such as QRreader or Scan}. The text code is great if a student doesn't have a camera on his/her device, or if you need someone to join remotely. Seesaw generates a text code from your teacher dashboard online only, and the code expires in 15 minutes, as shown below:


A note about student accessibility:
When using the class code sign-in option, the default setting is one where students can view other students' work. Obviously, if you are giving any type of assessments through Seesaw, it would be best to turn this option off. To do that, sign in to your teacher account via the web, click your name in the left corner, click the class name, and choose "manage class." Under the "students" heading, you will see this:


Classroom sign in means that students can scan a QR code to log in to the class. That iPad remains logged in to that class until a student signs out. Students can see each others' journal work and comment/like each others' work if the teacher enables that option. 

If you click on "classroom sign in," you'll see another option: "individual student sign in." There's a big warning under this option that says it's for 1:1 classrooms only, which I think scares a lot of people off. In reality, you can use this sign in option even if you're not a 1:1 school. The "individual student sign in" option still lets students sign in with a QR code, but when they sign in, they're prompted to choose their name from the class list. Once they choose a name, they see that person's journal and only that person's journal. The device remains logged in to that student's journal until the student signs out. This sign in mode does not even give the option for the teacher to enable liking or commenting of other students' work, since students only have access to their individual journal. 

You can switch back and forth between sign in options, but students will be logged out of the app on all devices each time you switch the sign in mode. 

Create folders to organize work {optional}
You can create color-coded folders and give students the option to submit their work to folders to keep your Seesaw feed nice and organized. 

To create a folder, go to the web version and click your name in the top, left corner. Click your class's name and then "manage class." Scroll down until you see the section on folders:


Click "manage folders." At the bottom of the pop-up box, click "+ New Folder." You'll see a screen like this:
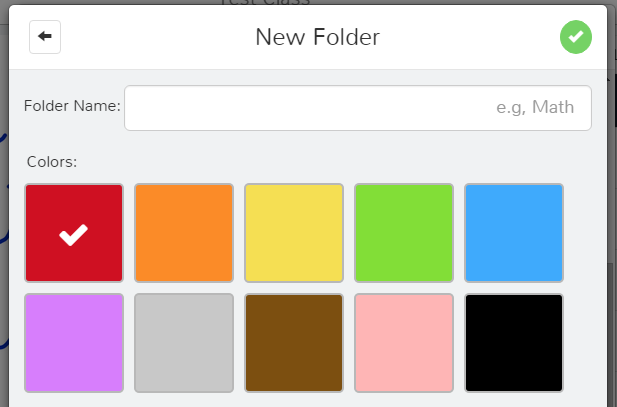

Name the folder and choose the color for it. After you click the check mark, you'll see a list of all the folders you created for that class:


Add as many folders as you want. When finished, click the "X" in the top, left corner. If you want students to be able to add work to folders themselves, be sure to enable access. Do this by finding the folder section in the "manage class" pop-up, and clicking "show add to folder step." Change yours to say "students & teachers," as shown below:


Let students sign in on personal devices
Since most teachers in CISD are using iPads, this section of the tutorial will focus on iOS. Be aware that students can use Seesaw from an Apple device, Android, Chromebook, or just the a computer with the website!

1. Make sure the Seesaw app is loaded. Links: iOS, Android, Chromebook

2. Click "I'm a student."


2. Scan the QR code (provided by the teacher).


If a QR code is not available, the teacher can pass on a text code (that expires in 15 minutes). The student could then press "Use a Text Code" and type the code on the following screen:


3. Once inside, your students will see a quick welcome message and then the main dashboard:


4. Find more options by clicking on the silhouette of the people in the top, left corner. 


Students can add an item by clicking on any square on the main dashboard or by clicking "add item" in the options screen. Feed view lets students view a stream of work, while calendar view lets students view work only from a specified date {more information will be given on this in a later post}.


Tweetable:

Other post in this series:
  • Features: available 10.10.15 {what students can do, what parents can do, and what teachers can do}
  • Getting Started: available 10.11.15 {signing up, creating a class, classroom sign in vs. individual sign in, creating folders, helping students sign in}
  • Student Navigation: available 10.12.15 {icon glossary, submitting work, viewing work, copying and editing, feed and calendar view, liking and commenting}
  • Teacher Navigation: available 10.13.15{finding student work in the feed, individual student journal, calendar, folders, flagged work} 
  • Pushing Work to Students: available 10.14.15 {converting printed files to digital ones, sharing PDFs vs. image files, pushing work to everyone vs. pushing work to select students, AirDropping images}
  • Interacting with Student Work on Seesaw: available 10.15.15 {student work: dissected, editing people and folders, downloading and sharing items}
  • More Options: available 10.16.15 {managing class, students, parents, folders, other, and administrative details; student avatars; premium version}

Saturday, October 10, 2015

Seesaw: Features

I used Seesaw {the free ePortfolio tool} with my K-4 students last year, and it helped us make the Science Lab almost completely paperless, so it's no wonder I continue to rave about this tool! As a Seesaw Ambassador {look for me in the southwest section!}, I get constant updates about what the team is doing to improve their {already awesome} tool, so I was inspired to write a series of blog posts on Seesaw. Check back frequently over the new couple of weeks or follow me on Twitter to make sure you don't miss any of this series! 

Due to the amazing new feature additions Seesaw has added over the past 6 months or so, I wanted to start the series with a feature review. 


What Kids Can Do
  • Sign in with a Google account {e-mail address required}, class code {no e-mail required}, or Seesaw-generated QR code {no e-mail required}
  • Take a photo or video from within the Seesaw app
  • Upload a picture or PDF file from the web
  • Import a photo into the app from the camera roll
  • Annotate on top of a photo or document using a variety of colors and a finger or stylus
  • Write on a whiteboard-like background using a variety of colors and a finger or stylus
  • Record student voice over a photo or drawing
  • Record student voice as they're drawing on a photo or whiteboard
  • Choose an an animal avatar or upload their own avatar picture {like a selfie}
  • Copy and edit a classmate's journal entry and add to their own journal
  • Like or comment on a classmate's work {if the teacher chooses to enable this option}
  • Share a link that they've copied from elsewhere
  • Type notes on digital notebook paper
  • Add work to a teacher-created folder for better organization

What Parents Can Do {if the teacher chooses to activate these options}:
  • See just their own child's journal work
  • Pay $10/year to keep the journal going from year to year
  • Like or comment on just their own child's work
  • I've heard they're working on giving parents the ability to download their child's journal at the end of the year...yippee! :)

What Teachers Can Do:
  • Set up your class for free {e-mail the Seesaw support team if you need more classes}
  • Invite co-teachers to classes
  • Invite parents to view their own child's journal
  • See which students have viewed work in their child's journal
  • Privately "flag" items to review later
  • View items in a feed similar to Instagram -- scroll down to see work
  • View items in a calendar view -- see how many items were added to the journal on each day, and click the calendar day to view items that were added that day
  • View the entire class's journal or one student at a time's journal
  • Add an item to the journal for kids to view and/or copy/edit/add to their own journal {see the kid section for more details on these abilities}
  • Add folders to better organize work
  • Like or comment on student work
  • After work is turned in, the teacher can edit which child's journal that work goes into, delete it, share it on social media, or download it to their computer

Other Great Aspects:
  • Totally free. There's a premium option ($10/year for parents or $5/child for schools), but I used the free version with no problems! {More information coming about this in a later post.}
  • Available via iOS app, Android app, Chromebook, or web browser
  • School version ($5/kid) gives an administrator dashboard that gives an overview of information on all classes {more info on this in a later post}
  • If kids used a selfie as their avatar, you automatically have pictures of everyone to use later as substitute teacher help when you're gone
  • During parent-teacher conferences, you can open that child's Seesaw journal and give the iPad to the parents -- the child's journal will contain enough sample work to be able to do most of the talking for you!


Other post in this series:
  • Features: available 10.10.15 {what students can do, what parents can do, and what teachers can do}
  • Getting Started: available 10.11.15 {signing up, creating a class, classroom sign in vs. individual sign in, creating folders, helping students sign in}
  • Student Navigation: available 10.12.15 {icon glossary, submitting work, viewing work, copying and editing, feed and calendar view, liking and commenting}
  • Teacher Navigation: available 10.13.15{finding student work in the feed, individual student journal, calendar, folders, flagged work} 
  • Pushing Work to Students: available 10.14.15 {converting printed files to digital ones, sharing PDFs vs. image files, pushing work to everyone vs. pushing work to select students, AirDropping images}
  • Interacting with Student Work on Seesaw: available 10.15.15 {student work: dissected, editing people and folders, downloading and sharing items}
  • More Options: available 10.16.15 {managing class, students, parents, folders, other, and administrative details; student avatars; premium version}

Tuesday, October 6, 2015

My Favorite Evergreen Apps

iPads are wonderful tools, but in order to use them to their full potential, it's important to look at evergreen apps. Evergreen apps are "non-subject apps useful throughout the year for speaking, writing, listening, drawing, annotating, curating, collaborating, sharing, and more." (Daccord, 2013.) I find evergreen apps more convenient than content-specific apps, as students (and I) can use them for a variety of projects, regardless of the subject or grade level.

Here are my favorite evergreen apps:

1. The "does everything" app:  Seesaw (free) or Explain Everything ($3.99)


If you teach elementary school, Seesaw is the app for you. While I've seen high school teachers use Seesaw, Explain Everything might be a better bet for the secondary crowd. (Secondary peeps: if you prefer a free app, Educreations is good -- it just doesn't have all the features Explain Everything does.)

Both have a whiteboard feature (among many other components!) that allows students to draw on the screen with their finger or a stylus and a recording option where students can record their voice over a project. This link will show you a series of blog post I wrote on my technology blog about Seesaw.

2. The tutorial app: Shadow Puppet Edu (free)


Users can string several photos or videos into one slideshow, and then record their voice over the entire presentation, adding text, music, and drawings where needed. The Shadow Puppet website has great examples from classroom teachers on how to use the app.

3. The poster app: Tackk (free)


Tackk (available in both an app and on the web) allows users to create online posters with a variety of media inside. Tackk is much like Smore, except Tackk allows users to create an unlimited number of posters per account, and teachers can easily create lesson plan template for students. Click here to learn more about Tackk.

4. The interactive images app: ThingLink (free)


ThingLink (available in an app and on the web) allows users to upload a photo and then apply "tags" -- in the form of plain text, links, or other embedded content -- across the photo. Click here to learn more about ThingLink.

5. The mind map app: Popplet Lite (free)


Popplet is a brainstorming app that allows users to create bubble maps. You can save bubble maps as PDFs or image files, and then import into another app such as Canvas or Seesaw to share. Click here too see a popplet my students made when discussing science tools. Click here to view public popplets for more ideas.

6. The assessment app: Socrative (free)


Socrative (available in an app and on the web) is my favorite paperless assessment tool. Teachers can ask questions on the fly, give students a pre-planned quiz, or engage students with a "space race" competitive assessment before receiving data quickly in the format of their choice.

7. The brainstorming app: Padlet (free)


Padlet (available on the web and in a brand new app) lets users create a central hub for collaboration. It's great for discussion questions, mind maps, virtual "parking lots," and much more.

8. The collection app: Google Forms (free)


Technically, users can only create Google forms from a computer. But since finished forms are accessible from a mobile device, I'm throwing this one in the mix. Google forms are so versatile! Once you create a form from the computer, send students the link or attach it to a QR code for students to scan at their convenience. This blog post tells you how to create a Google form and suggests ways for using it in the classroom.

9. The collaborative drawing app: Whiteboard Lite (free)


On the surface, this just appears as a plain whiteboard app, but there's an awesome feature that will help students write/draw collaboratively from different devices: users on the same WiFi connection can draw on the same whiteboard simultaneously, and the other person's drawings appear in real time on your device.

10. The note-taking app: Paperport Notes (free)


This is a nice alternative to the widely-hailed but expensive (for an app) Notability. Paperport Notes lets users add blank or lined pages, camera images, files from cloud services, web snippets, and clipboard contents to digital notebooks. Users can then type, draw, or highlight with their finger or stylus, and/or record a voice over each page.


Tweet This:

References